DraftSight Profiles
It’s happened us all at one stage or another, the time arrives when you have to change your laptop or desktop PC. You make a checklist of what needs to go on your new computer:
- Email – check
- Office – check
- DraftSight – check
- Documents – check
- Photos – check
You find the install disks, licence codes, logon details for it all and you spend hours, normally at the weekend, setting up your laptop just as you want it. Everything is running just fine. That is until you start DraftSight and you notice that your profile is not the same! Customised commands are gone, the menu layout has reverted back to default, in fact, everything has reverted back to the default look and feel!
So, what can you do about this? Well it’s simple really. Fire up your old computer and start DraftSight and go to Options in the Manage tab.
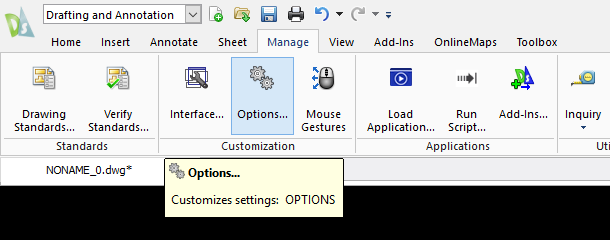
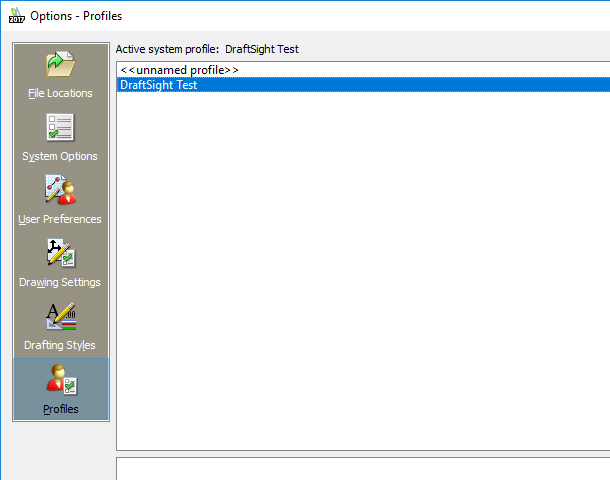
Next, click on Profiles in the left hand column.
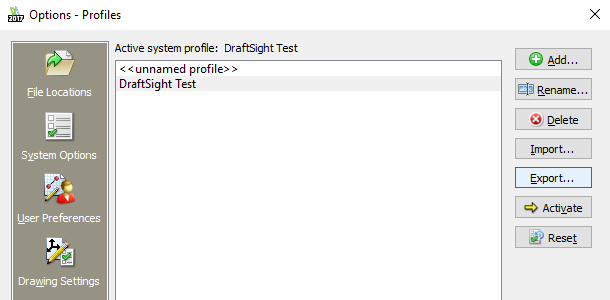
After that, click on Export
Finally, select a location to save your exported profile.
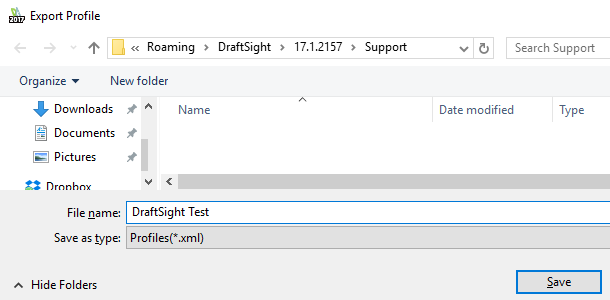
Once you have exported your profile, transfer it to your new PC. Again, start DraftSight and go to Options in the Manage tab. Click on Profiles, and then click on Import.
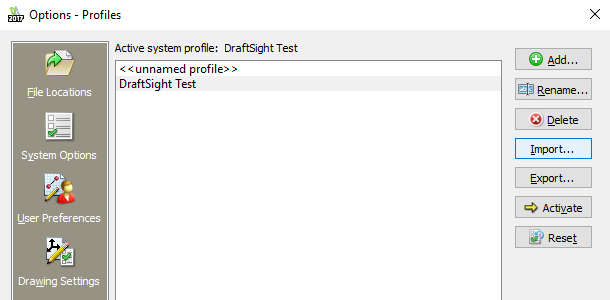
Browse to the location of your exported Profile and select Open.
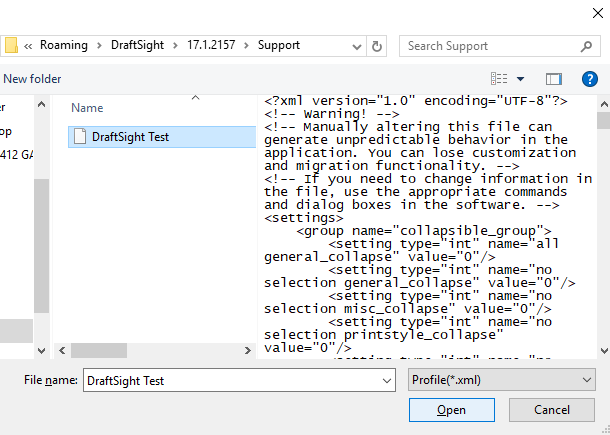
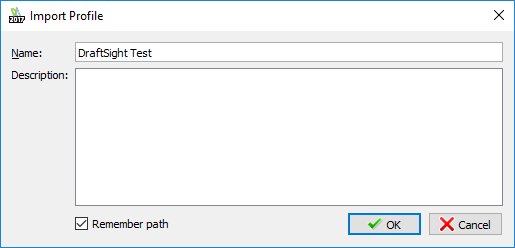
Next click on OK.
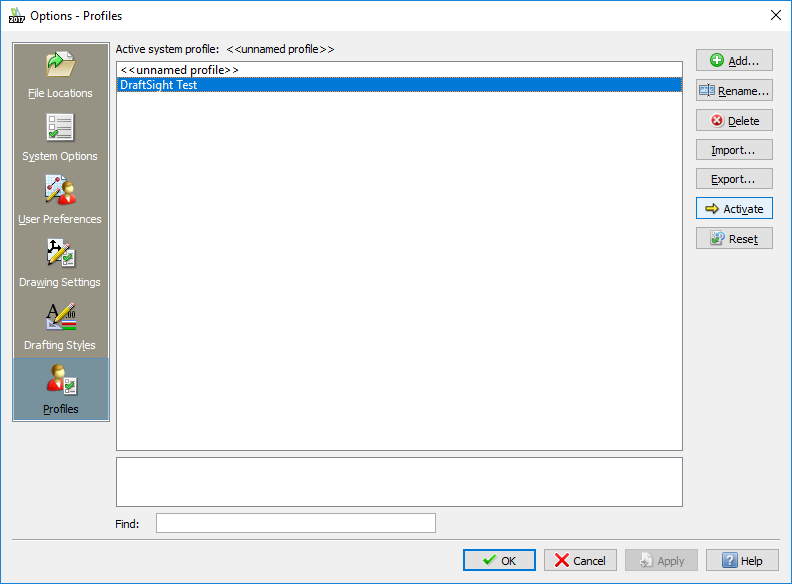
Finally, click on your Profile name and select Activate and then click on OK. Your Profile will now be loaded. Your customised commands and menus should all return as they were on your old computer.
So, that’s how to transfer your profile from one PC to another. It’s quite easy to do and if you use a heavily customised DraftSight Profile, backing it up to an external source might save you a lot of time should your laptop or PC fail. I know it did for me!
To purchase DraftSight Professional, click here. To request a quote for DraftSight Enterprise, click here.
Discover more about DraftSight and how you can boost your productivity with DraftSight Professional, a powerful 2D design solution for professionals that includes productivity tools and an API.


