Creating a LineStyle in DraftSight


Sometimes, when creating a drawing, you need a LineStyle that is different to anything you have installed. Perhaps it’s to highlight a service or a boundary and you just need to make it stand out.
Well, in today’s blog, we are going to show you how to create your own LineStyle and how to load it in to DraftSight. All you need is Notepad and a small bit of knowledge.
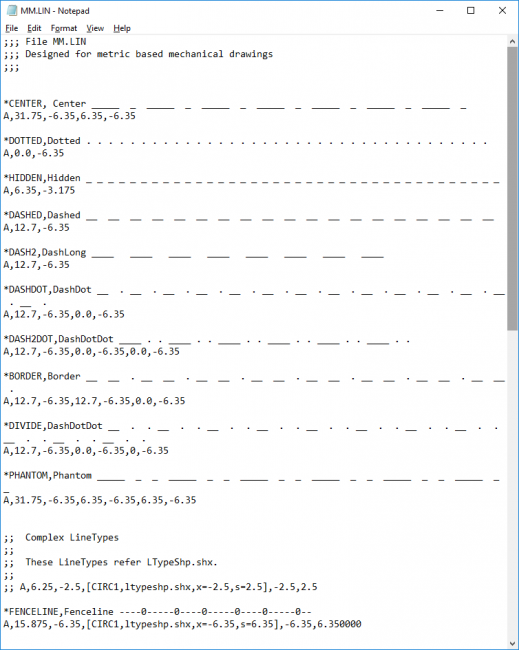
The default DraftSight LineStyles can be found in C:\Program Files\Dassault Systemes\DraftSight\Default Files\Linestyles and if you browse to that directory, you’ll see inch.lin (for imperial drawings) and mm.lin (for metric drawings). I’m going to edit mm.lin as I use the metric system.
So, the first step is to open mm.lin in Notepad. You’ll see something like this:
We’re going to scroll to the end of the file and enter the following text:
;; Custom LineStyles
;;
;; These LineStyles are Custom LineStyles created in-house.
That’s just a note to anyone who opens the LineStyle file later on and tells them what we have done.
Before we go any further, let me explain just what a LineStyle is. Basically, a LineStyle consists of 2 lines of text. The first line consists of the LineStyle Name, LineStyle Description and an Example of the LineStyle.
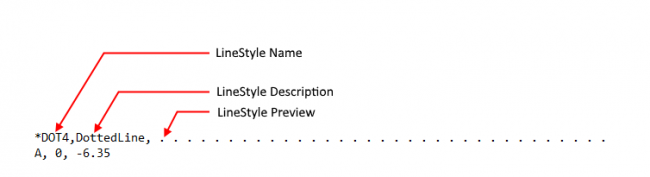
The second line is a little more complicated! It starts with A, which is the Alignment Type. I have to be honest here, in my many years of using DraftSight and other CAD packages, it has always been A, I don’t know why, I never questioned it.
Next comes the length of the line. This is always a positive number. Because in our example we are using 0, that gets represented as a Point. Next is a Negative Number and this indicates the distance/space between the Points.
Our example above is quite simple, it creates a Dotted Line with the dots tightly compressed together, but you can create more complicated LineStyles. The simplest way to do this is to open either the Inch.lin or MM.lin files, finding a LineStyle you like and then copying the text and editing it. It’s surprising how quickly you will pick it up. Just to be on the safe side though, always make a backup of your LineStyle file before you edit it!
OK, you’ve created your LineStyle, how do you use it? Well, open Draftsight and type LineStyle at the Command Window.
Next click on Load and you’ll see the Load LineStyles dialog box. Scroll down till you see your LineStyle Name, select it and then click on OK.
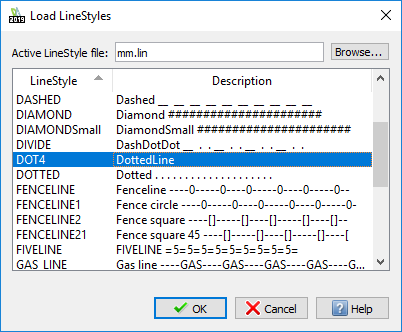
Your LineStyle, in this case Dot4, will load in to DraftSight.
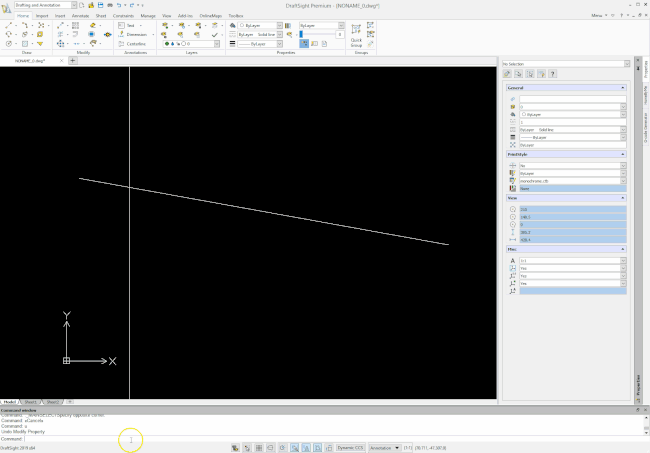
The video below will show you how to quickly change the LineStyle of an entity.
And that’s it, that’s how to quickly create and use a LineStyle in DraftSight!
IMPORTANT:
DraftSight 2019 for Windows® is offered in paid versions only.
Once you download and install DraftSight 2019 (free 30-day trial or purchased version), you will no longer be able to re-download or access any previous free version of DraftSight (2018 or earlier). All free versions of DraftSight (2018 or earlier) will cease to run after 12/31/2019.
Learn more about DraftSight 2019 here.
Latest posts by MJ Smyth (see all)
- Resetting DraftSight to Default Settings - April 12, 2021
- Associative Patterns in DraftSight 2021 - March 24, 2021
- DraftSight 2021 SP0 Now Available - March 3, 2021