An Introduction to 3D Design in DraftSight – Part 1
If you are looking for robust 2D drafting with full 3D design capabilities in one environment, you’ll want to check out DraftSight Premium or Enterprise Plus. These offerings include the 3D Modeling Workspace, where you can access the full suite of powerful 3D modeling and editing tools.
Today, in part one of our two-part series, we’re going to introduce you to some of the basic concepts of working in 3D DraftSight.
The 3D Modeling Workspace
All the tools you’ll need for 3D modeling in DraftSight are found in the 3D Modeling Workspace. Use the Workspace pulldown menu to change your current Workspace to 3D Modeling.
When the workspace is changed, the Ribbon will change to display the 3D-specific tabs and panels.

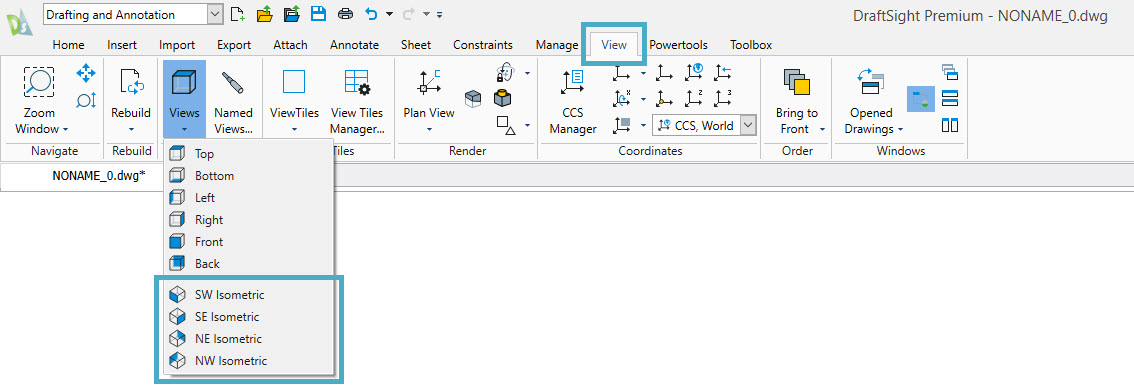
You’ll need to be able to view your designs in 3D. DraftSight makes it easy to get started with preset 3D Isometric views.
From the View tab of the Ribbon, click on the Views pulldown and select any of the Isometric presets. With no geometry yet in the editor, you will notice that the CCS icon changes its orientation to the chosen view, and the main tool icon also changes to reflect your selected preset.
This is typically the first step to beginning your 3D model. After all, if you remain in the 2D work plane, you won’t be able to see the portions of your design that extend up or down into the Z axis. It’s much easier to draw 3D objects when you can visualize them as they are created.

Types of 3D Objects
You’ll have access to various types of objects in the DraftSight 3D Modeling environment. The types of objects you can create include Solids, Meshes, and Faces.
A Solid is an individual entity that represents the volume and shape of an object. Meshes can represent the same shapes but are defined by multiple faces, edges, and vertices. A Face is a three- or four-sided, infinitely flat object. Meshes are comprised of multiple connected Faces.
From left to right below, we see a 3D Solid sphere, a 3D Mesh sphere, and a 3D Face.

There are a few other entity types that can be used in 3D Modeling. Planar Surfaces are flat 2D surfaces with a length and a width but no height. They are always rectangular.
3D Polylines are similar to the 2D Polylines you’re already familiar with but allow you to define their vertices with differing (z-axis) elevations.
Also, Patterns can be created with both 2D and 3D rows and columns.
3D Modeling Basics
Now that you know where to find your tools and are familiar with what you can create, it’s time to explore some basic modeling objects. We’ll start with the eight types of 3D Solid Primitives or the basic shapes. They are found within the first two icon groups in the Modeling Panel of the Ribbon’s Home tab.
The first group allows you to create a Box, Pyramid, and Wedge (along with a Planar Surface).
From the middle group, you can create a Cone, Cylinder, Sphere, or Torus.

Once you’ve learned how to create each of the basic Primitive objects, you should explore each Unique Primitive tool, which can be found in the third icon group. These will not only allow you to convert your 2D entities into 3D objects, but will also aid you in creating more complex objects and shapes.
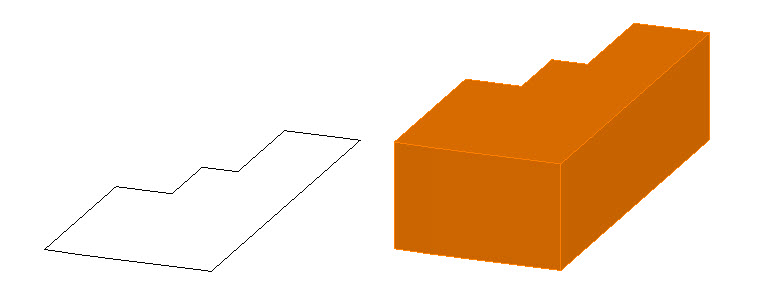
Tools, like Extrude and PushPull, allow you to transform 2D shapes by adding a 3D thickness. You can specify a height or just move your mouse to create your object dynamically.
Other tools allow you to create new shapes by revolving around an axis or sweeping around a curved path.

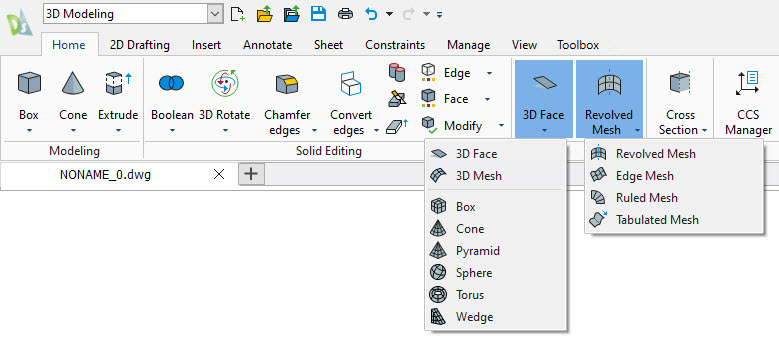
You’ll also find similar Mesh primitives within the Mesh panel of the 3D Ribbon. These require more input, such as requiring you to define individual definition points or specifying the number of surface segments. Also, they are not created dynamically, so they can be much more difficult to create.

Summary
There’s a lot to 3D design in DraftSight Premium and Enterprise Plus. So much, in fact, that we’re going to come back with a second blog on this topic.
Today, hopefully, you’ve learned a bit about the 3D environment and what kinds of objects you can create. Next time, we’ll focus on the various editing tools that you’ll use to modify your objects or to create more complex objects.
Until then, why not give DraftSight a try for yourself? Just go here to download a free, 30-day trial of DraftSight Premium and see for yourself why so many design professionals have made the switch.


