Flip out for Surface Finish Symbols with DraftSight


Clear technical drawings make manufacturing more efficient, and surface finish symbols help convey important details without adding clutter. These standardized symbols specify texture requirements directly in your design. With DraftSight, adding them is simple, ensuring your drawings remain precise and easy to read.
What is Surface Finish?
Surface finish significantly impacts manufacturing and engineering, affecting everything from a part’s appearance to its performance. It’s all about texture—how smooth or rough a surface is after machining, grinding, or finishing. Surface finish influences how parts fit together, how long they last, and even how much they cost to produce.
Surface Finish Symbols Explained
Like welding symbols, surface texture symbols keep drawings neat while communicating critical information. Instead of adding lengthy notes, these compact symbols specify details like surface roughness callouts, machining requirements, and material removal allowances.
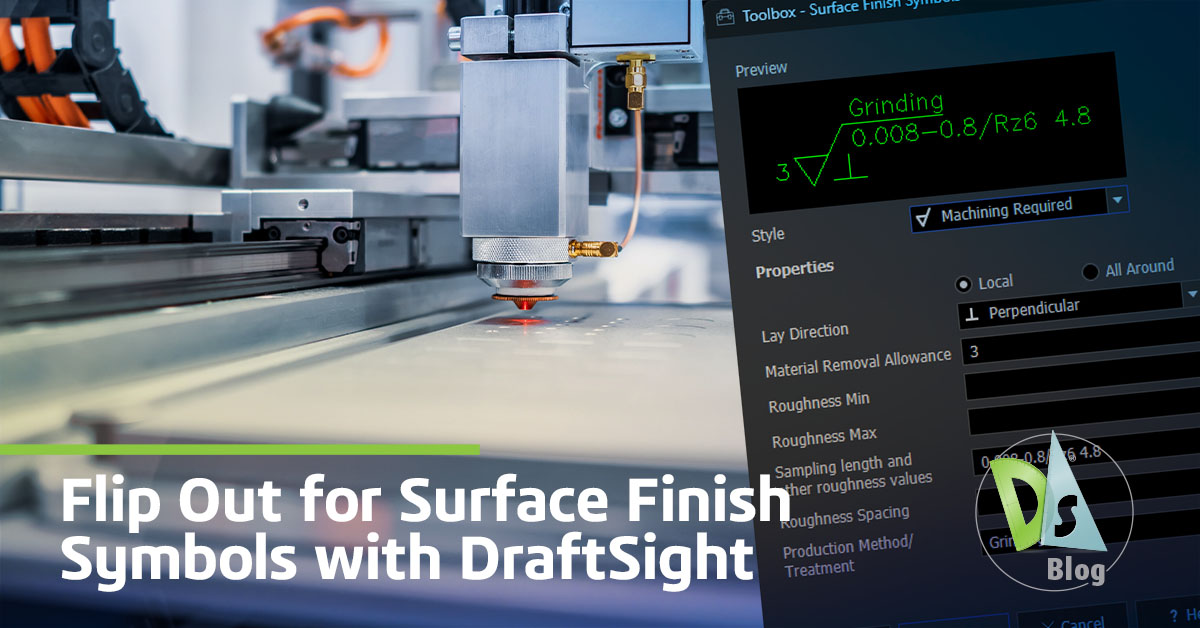
DraftSight makes it easy to add these symbols. You’ll find the Surface Finish Symbol tool in the Symbols section of the Toolbox tab. Clicking on it opens a settings window where you can define key attributes, including surface finish standards, lay direction, and surface roughness symbols with minimum and maximum values. Once everything looks good, clicking OK attaches the symbol to your cursor, ready to be placed exactly where you need it.
Need to flip the symbol’s orientation? That’s where the Flip Surface Finish Symbol tool comes in handy, instantly adjusting the direction with a single click.
Importance of Surface Finish Specifications
Surface finish affects how components function, how they fit together, and even how much they cost to manufacture. The right surface finish callout on a drawing can reduce friction and wear, prevent corrosion, and ensure parts are assembled correctly.
Using standardized surface roughness symbols in your DraftSight drawings keeps things clear for manufacturers, reducing the risk of misinterpretation. Understanding surface finish standards can help avoid unnecessary machining costs.
Step-by-Step Guide to Surface Finish Callouts
Adding surface roughness symbols in DraftSight is a straightforward process. Simply navigate to the Symbols section in the Toolbox tab and select the Surface Finish Symbol tool. From there, an options window allows you to set your preferred surface finish chart style, whether it’s Basic, Machining Required, or a JIS standard. Before placing the symbol directly in your drawing, you can enter the necessary specifications, such as surface roughness callout values and lay direction.
If you need to fine-tune your symbol’s appearance, the Settings button in the options window lets you adjust layer preferences, text styles, and sizes. And if you ever need to adjust the symbol’s orientation, the Flip Surface Finish Symbol tool makes repositioning a breeze.
Best Practices for Surface Finish Callouts
Clarity is key to getting the most out of surface texture symbols. Choosing the correct surface finish units ensures accuracy while consistent surface finish callout formats help maintain clear communication across teams. Overcomplicating things with unnecessary tight tolerances can drive up costs, so it’s always a good idea to specify only what’s truly needed.
DraftSight’s surface finish symbols make creating precise, professional drawings easier than ever. With just a few clicks, you can add essential details that streamline production and improve communication, all while keeping your designs clean and organized.
Ready to give it a try? Open DraftSight and start adding surface finish callouts like a pro. If you haven’t tried DraftSight yet, you can take it for a test drive with a 30-day free trial of DraftSight Premium.

Latest posts by DraftSight (see all)
- When DraftSight Needs a Fresh Start: How to Reset to Default Settings - February 4, 2026
- DraftSight Migration Guide Blog - February 2, 2026
- DWG Rescue: Bringing Problem DWG Files Back into Working Order - December 12, 2025