Using Drawing Templates in DraftSight


I want my drawings to look good. I want them all to have the same look and feel. If someone picks up one of my drawings, I want them to recognise them as mine. If I send a drawing to a client, I want them to be able to open any drawing and know that the layers, linetypes, textstyles and so on will be the same from drawing to drawing. Likewise, if I need to farm out CAD work, I want it to adhere my standards. So, how do I do that? Well it’s simple really, I use Drawing Templates.
So, you’re probably asking, what’s a drawing template? Well, a drawing template is a DraftSight drawing file that contains predefined settings and entities such as:
- Layers
- Linetypes
- Dimension Styles
- Text Styles
- Units
- Title Sheets
- Blocks
I do various different types of CAD work such as Electrical and HVAC Service Drawings and Architectural Layouts for different clients. Each client has their own drawing style, so they all get their own template. If Client A wants a drawing created, I start with their individual template file.
This means that as soon as I use that template drawing as a basis for a new CAD drawing, I have the correct text styles, linetypes, dimension styles and so on already in the drawing. It also means that I have their Title Sheet already in Sheet Space, ready for plotting.
Once you’ve created your drawing template, adhering to CAD Standards a simple affair.
So, you’re probably wondering how you would go about creating a Drawing Template for your own use. Well, it’s quite simple really. I’ll go through the steps involved in setting up a template that has layers, text styles, linetypes and a title sheet already inserted.
Step one is the hardest, open DraftSight!
OK, that’s the hard bit done, now on to the easy part, creating layers, text styles and inserting a title sheet.
By now you probably all know how to create a layer in DraftSight. If not, type Layer at the command line and the Layers Manager will appear on screen.
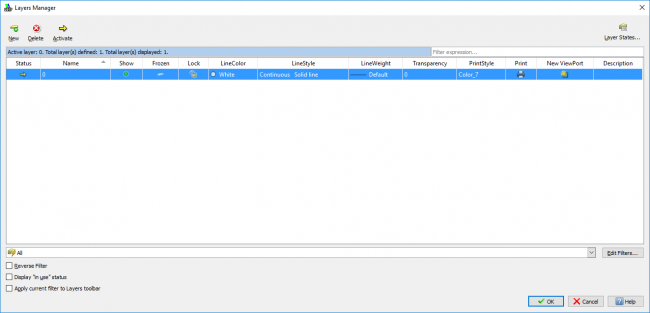
On the top left of the Layers Manager, you’ll see New, click on that and set up your new layer. Continue to do so until you have created the required layers. Once all your layers are created, click on OK.
Next up, we will create some text styles. At the Command Prompt, type Textstyle and hit enter. The Textstyle dialogue box will appear.
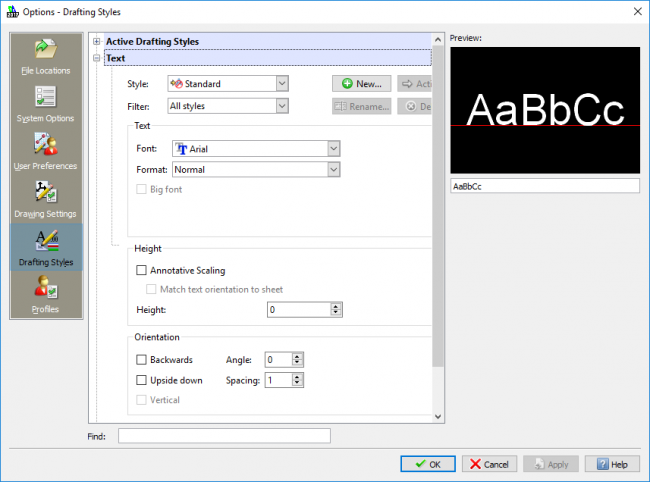
As with the layers, set up your different text styles here. Personally, I like to keep things simple. Too many text styles can make a drawing look messy and cluttered, and no one wants that!
Finally, we’re going to insert a title sheet in to our drawing. Swap over to Sheet Space and type Insert at the command prompt. The insert block dialogue box will appear, browse and select the title sheet you want to use and click OK. Just follow the onscreen prompts and your title sheet will be inserted.
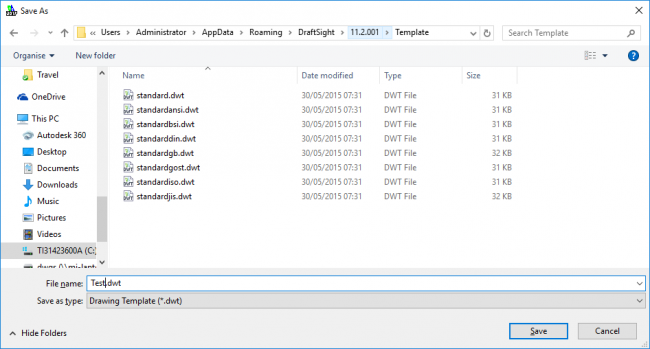
The last thing to do is to save your drawing file as a template. To do this, type SaveAs at the command prompt and select Drawing Template as the file type. I would suggest given the drawing template a name that will mean something, such as “Company A1 Template” or similar.
I’ve only covered layers, text styles and a title sheet here, but you can insert many different entity types in your template file. That pretty much covers how to quickly and easily create a template drawing in DraftSight!
Discover more about DraftSight and how you can boost your productivity with DraftSight Professional, a powerful 2D design solution for professionals that includes productivity tools and an API.
www.DraftSight.com/Professional
Latest posts by MJ Smyth (see all)
- Resetting DraftSight to Default Settings - April 12, 2021
- Associative Patterns in DraftSight 2021 - March 24, 2021
- DraftSight 2021 SP0 Now Available - March 3, 2021