The Importance of CAD Standards: Text Styles


In previous blogs on CAD Standards in DraftSight, we spoke about the importance of Layers and Blocks. Today we are going to talk about Text Styles, what they are and how to use them.
So, just what are text styles?
I’ll try to explain this as simply as possible. Text Styles allow you to define different fonts and styles to text in your drawings.
For example, on your Title Block, you may have one style for the drawing title, drawing number, date and so on, and a different text style for your company name and your client’s name.
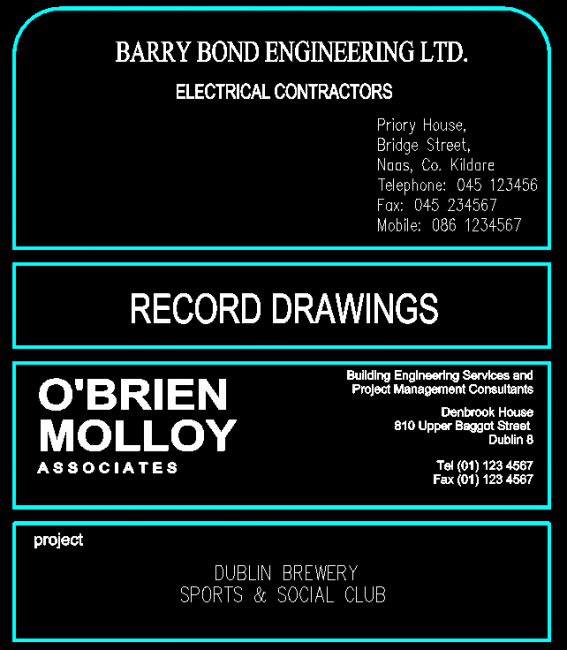
In the example above, you can see various different styles used in a drawing title block. Each section of that title block needs its own text style to highlight the different design team partners on the project.
If all the text looked the exact same, it would be very difficult to distinguish the design team members on the drawing.
Why would I use text styles?
Neat text, correctly aligned is one of the keys to a good CAD drawing. For example, room names in a drawing should all be the same font and the same height (and on the same layer!). Your notes should be the same font and height, unless you specifically need to highlight a note using bold or italic.
Too many fonts and text of various sizes throughout a drawing just make it look messy and difficult to read.
Naming your Styles
Like naming layers and blocks, I would suggest keeping text style names simple in DraftSight. It makes them easier for other design team members to understand and to work with.
As you can see in the image below, there is a text style for Barry Bond Engineering, another for O’Brien Molloy, and actually there are two for them as they used two different fonts in their logo. I also have a style for the Title Block text and of course the Standard text style in DraftSight is there by default.

Naming the text styles like that leaves the user in no doubt as to what each text style relates to in the drawing.
As I mentioned earlier, try to limit the amount of text styles you use in a drawing. Too many will make your drawing look cluttered and untidy. On the other hand, too few and it will be hard to distinguish the important data from everything else.
So, how do you create a text style?
Creating text styles in DraftSight is, like everything else, quite simple. From the menu, go to Format and then select Text Style. The Drafting Styles Dialogue box will then appear on screen.
Click the + beside Text if it’s not already expanded to display the various different options for creating Text Styles.
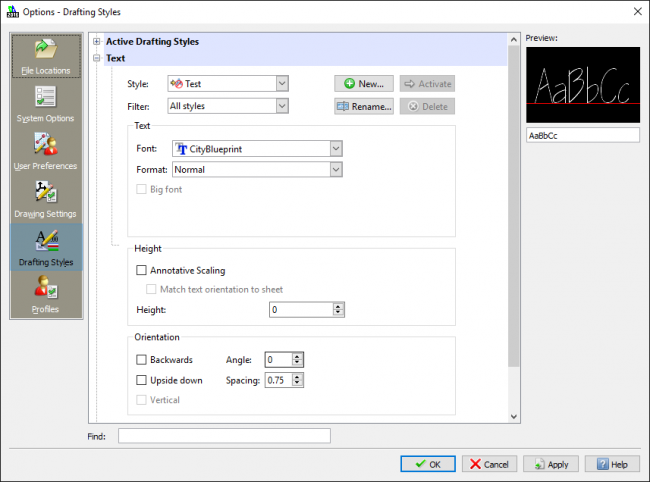
Select New and enter a name for your new text style. Next, select a font you’d like to use for that text style. In the example above, I have selected CityBlueprint. You can also pre-set the height, angle and spacing for the text style whilst in the dialogue box.
My personal preference is for a spacing of .75, I find it just makes the text that bit neater. I don’t bother changing the angle and I leave the text height at 0 so it I can choose what height I want the text to be at a later stage.
I’ve created my text styles, now what?
You’ve created your text styles and now you’d like to use them in your new drawing. So how do you go about that?
If you already have text in your drawing and you would like to make it look different to other text, you can highlight the text and then in the Properties Dialogue Box (in the Text section), you can select any of the text styles already in your drawing. Your text will automatically change to the selected text style.
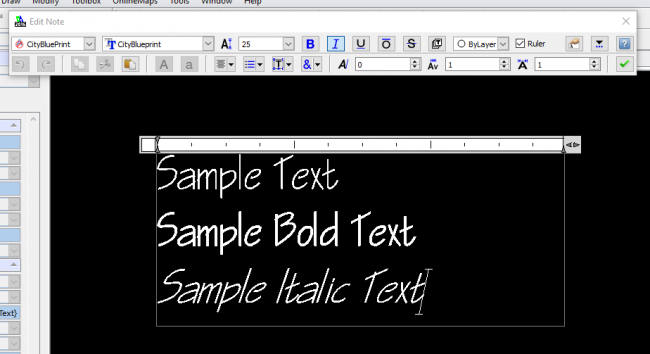
If you have no text in your drawing and are starting from fresh, use the Note command and select the text style you want to use from the drop down menu. You can set the text height, whether you’d like the text to be Bold or Italic also. Actually, there are quite a few different options available, play around with them and see what they do!
So that pretty much covers the basics of text styles in DraftSight. Now that you have a grasp on text styles, in a future blog we will talk about text heights in drawings, and make some suggestions on what we think makes a neat and tidy looking drawing.
Next up in the cad standards blogs, though, we will talk about Line Styles and how to load them in DraftSight and how to assign them to layers and to entities.
Discover more about DraftSight and how you can boost your productivity with DraftSight Professional, a powerful 2D design solution for professionals that includes productivity tools and an API.
http://www.draftsightprofessional.com/professionalfeatures
Latest posts by DraftSight (see all)
- Shanghai International Circuit: The Geometry Behind the Chinese Grand Prix - March 13, 2026
- Engineering Precision: Melbourne’s Grand Prix Circuit with DraftSight - March 6, 2026
- When DraftSight Needs a Fresh Start: How to Reset to Default Settings - February 4, 2026