DraftSight – PrintStyles


PrintStyles… You may have heard of them, but for a lot of users they are a dark art. Today I’ll try to explain simply what they are and why you might consider using them.
So, lets start with what they are. Put simply, a PrintStyle controls how an entity in DraftSight is printed.
You can see in the animation below, each colour has a different LineWeight assigned to it.

You’ll notice that while the LineWeight changes depending on the colour of the entity, the LineColor stays at Black. You might be wondering why, well it’s simple actually, that PrintStyle is for an A0 size Mono Laser Printer. In the image below, you can see how the drawing looks in DraftSight.
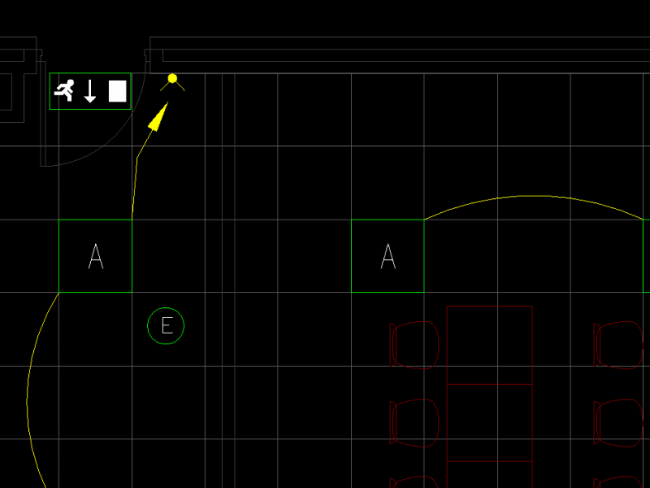
All the lines, although different colours, appear to be the same width. But if I then print that drawing using the Kipstar A0 PrintStyle above, you can clearly see the difference.
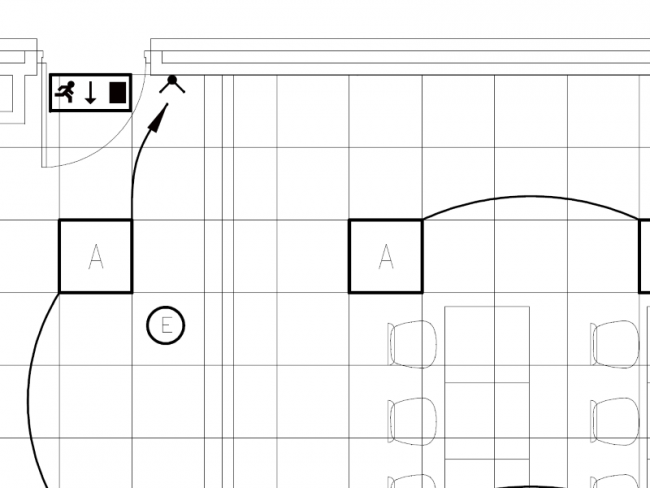
My clients want their equipment to standout on their drawings. So, whilst the architectural and furniture layouts are important, it’s more important for their Lighting Layout to stand out. Again, you may be wondering just why are the drawings in B&W, why not colour? Well that one is quite simple actually. Costs, it’s cheaper to produce B&W drawings!
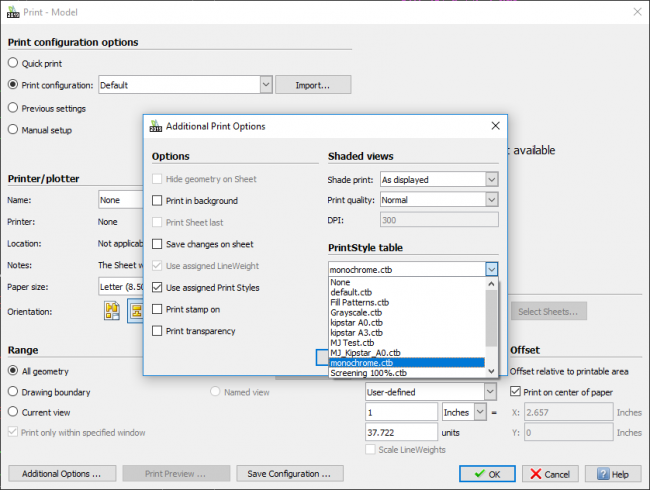
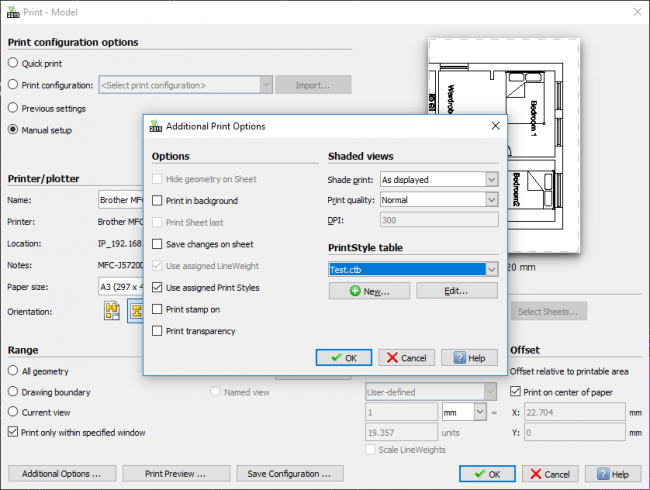
So, how do you create a PrintStyle? Well, first off, open up the Print Dialogue in DraftSight. Then, on the bottom left you’ll see Additional Options. Click on the button and you see the Additional Print Options Dialogue box appear. As you can see below, I have Kipstar A0 and Kipstar A3 PrintStyles. The A0 PrintStyle is for drawing sizes A1 and A0. The A3 PrintStyle is for A4, A3 and A2 size drawings. Most of you will know that if you print an A1 drawing at a scale of 1:2, it fits perfectly on an A3 sheet, but with double the scale. So, an A1 at 1:50, becomes an A3 at 1:100. That would obviously affect LineWidths when printing, so that’s the reasoning behind the two PrintStyles.
To create a new PrintStyle, just click on New. You’ll be prompted to give it a name. In our example, I’ll just use Test. Next, click on Edit. The PrintStyle Table Editor will load. So, what can you do here? Well, for each colour, you can tell DraftSight to print it using a specific LineColor, LineStyle or LineWeight. So, all entities using Color_2 could have a LineWidth of 0.3500mm, a LineStyle of Dottted and a LineColour of 30. Now, you might wonder why I changed the LineColor to 30 when printed. Well, again, it’s rather simple. Color_02 is Yellow and does not print well when printing coloured drawings. Color_30 is a dark Orange and stands out better on the printed sheet. Simple really.
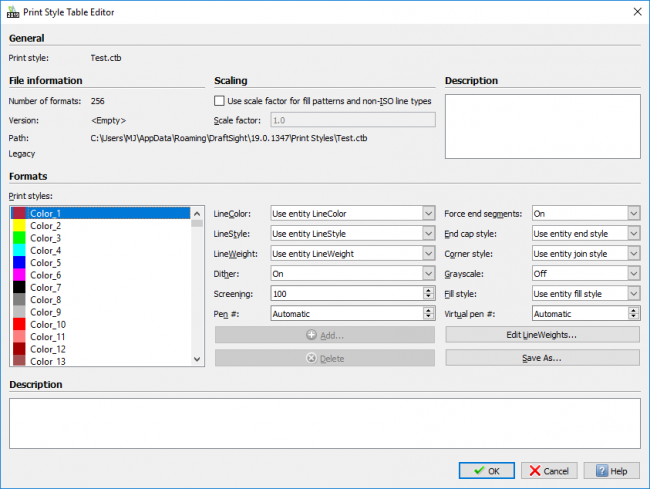
There are other options in the PrintStyle Table Editor, such as turning Dithering On or Off, or setting different Screening levels and so on. It’s worth spending a bit of time tweaking your PrintStyles to suit your own needs.
OK, so you’ve created a PrintStyle, how do you use it? Well that part is simple! When you go to plot your drawing, click on Additional Options again and just select the PrintStyle you would like to use. I’ll select the Test PrintStyle we just created.
Once selected, click on OK, then go ahead and print as normal. And that, in a nutshell, is PrintStyles and why and how I use them!
IMPORTANT:
DraftSight 2019 for Windows® is offered in paid versions only.
Once you download and install DraftSight 2019 (free 30-day trial or purchased version), you will no longer be able to re-download or access any previous free version of DraftSight (2018 or earlier). All free versions of DraftSight (2018 or earlier) will cease to run after 12/31/2019.
Learn more about DraftSight 2019 here.
Latest posts by MJ Smyth (see all)
- Resetting DraftSight to Default Settings - April 12, 2021
- Associative Patterns in DraftSight 2021 - March 24, 2021
- DraftSight 2021 SP0 Now Available - March 3, 2021