Starting A Project in DraftSight – Part 3


In our previous blog, I spoke about setting up drawings for a project and I mentioned that my title block prompts the user to insert project data upon insertion. In today’s blog, I’ll talk about creating your own Title Sheet and adding the same functionality to it.
So, to start with, you have to decide what size sheet your Title Sheet is for. I’m going to use A1 which measure 841mm by 594mm. Next, I open DraftSight and create a layer called TitleFrame. I assign this Layer the Colour 08 and set it to not print.
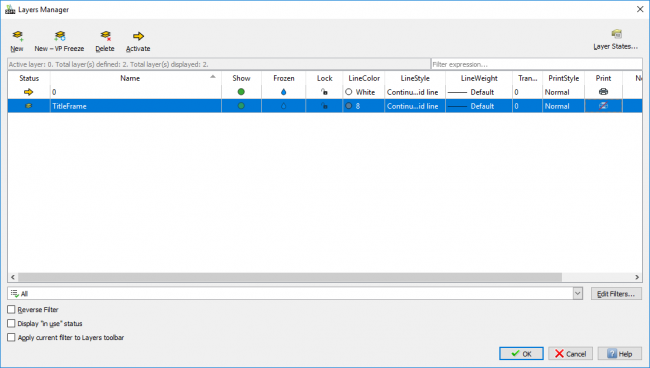
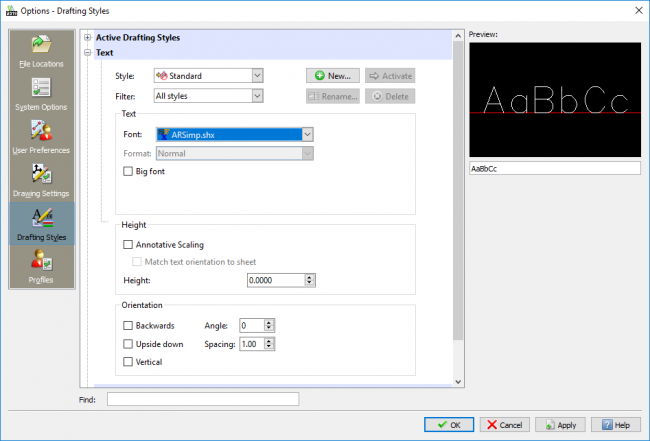
You might wonder why I do this? Well, it’s simple. I set the color to 08 so that it fades nicely into the background and I set it to not print, because I’m going to draw a Rectangle on it 841mm by 594mm and that’s going to be the frame of my Title Sheet. I then create a Text Style using the Style command. I like to keep things clean and simple when it comes to text. I use the font ARSimp.shx for the vast majority of my text. It’s a simple font, but it is crisp and clear. Obviously though, this is a personal choice and you are free to use whatever font you like!
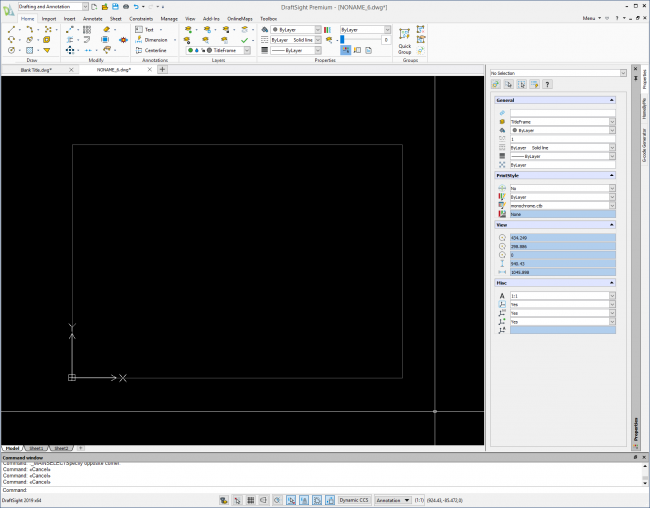
So now with 0,0 as my starting point, I create my Rectangle.
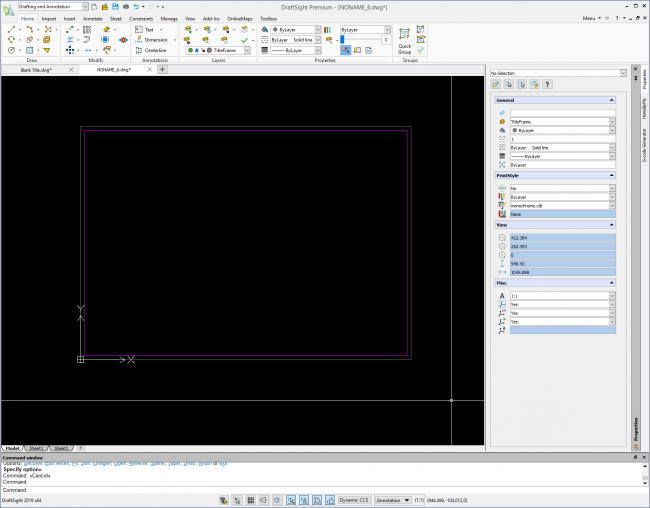
Next step is to create another layer. I call it TitleBlock and give it the color 06. I Offset my Rectangle by 10mm and change it’s layer to TitleBlock.
OK, so that’s the Frame of the Title Sheet created, now to add some detail. At the top right of my Title Sheet, I like to put in a note that says “DO NOT SCALE FROM THIS DRAWING. WORK TO FIGURED DIMENSIONS ONLY.” I also like to have the File Reference displayed so that I know the DraftSight File Name, should I ever need to open it again sometime in the future. To do this, I use the MakeBlockAttribute command.
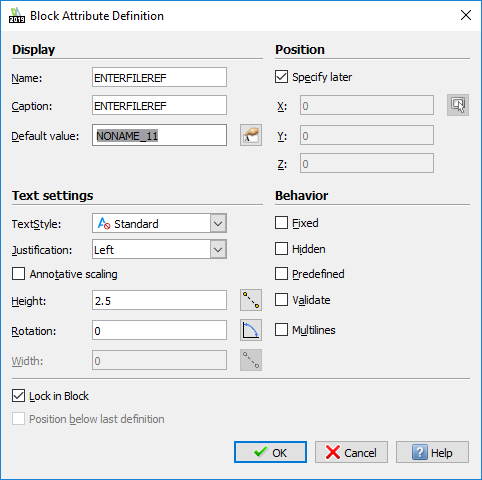
I enter in the details, then I locate the Text on my Drawing.
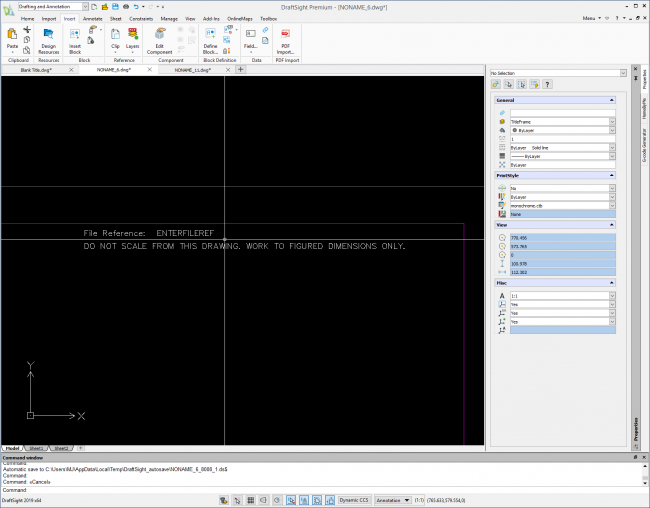
OK, so, what we have done there is create a piece of Text with an Attribute. Now, we are going to copy what we have just done and finish off the Title Sheet. Well, we will once we’ve drawn a few more lines!
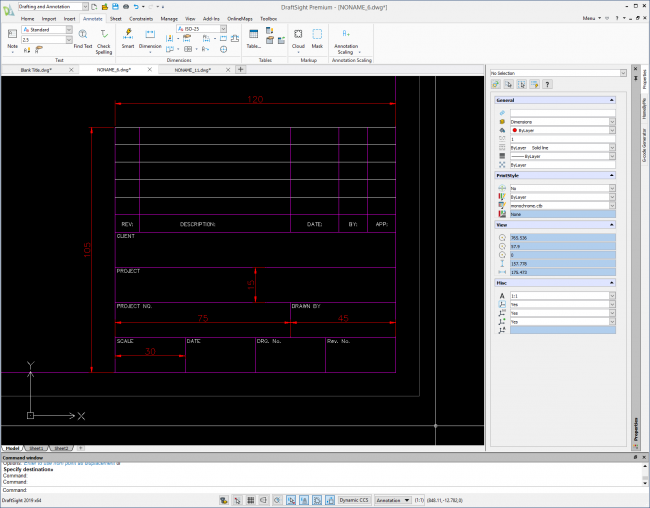
As you can see above, I have indeed added a few more lines and text to our Title Sheet. I’ve put in the Dimensions just in case anyone would like to replicate the Title Sheet. So, now, using the MakeBlockAttribute command again, we just add in some more Attributes to our Title Sheet.
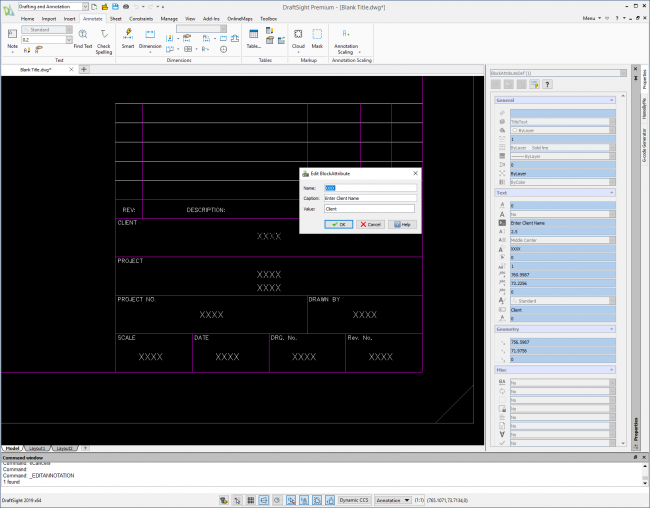
As you can see in the example above, I’ve created Text Attributes for each of the areas on the Title Sheet. I used the exact same method I mentioned above to do this.
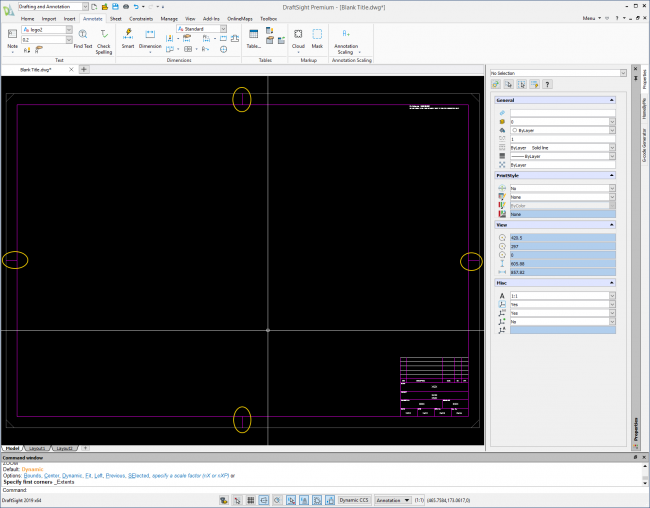
The last thing I did was to add some Folding Marks on the Title Sheet. You can see them circled in yellow above. I don’t print drawings all that often these days, but when I do, I like to fold them rather than roll them and the marks just indicate the folding points. You don’t need them, they’re just a throwback to a different age for me!
So that’s it, that’s our Title Sheet create. When you insert it into a drawing, you will be asked to Specify Block Attributes. You can fill them in at the Command Window or you can just hit Enter multiple times and the Title Sheet will insert with default values. If you then Double-Click on the Title Sheet, you’ll get the following dialogue box displayed and you can enter in the Project Details there.
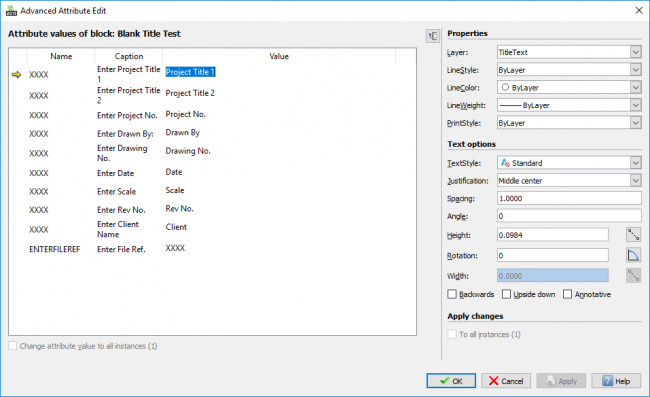
And that’s it. That’s the simple way to create a Title Sheet that prompts you for Project Details when you insert it into a drawing.
IMPORTANT:
DraftSight 2019 for Windows® is offered in paid versions only.
Once you download and install DraftSight 2019 (free 30-day trial or purchased version), you will no longer be able to re-download or access any previous free version of DraftSight (2018 or earlier). All free versions of DraftSight (2018 or earlier) will cease to run after 12/31/2019.
Learn more about DraftSight 2019 here.
Latest posts by MJ Smyth (see all)
- Resetting DraftSight to Default Settings - April 12, 2021
- Associative Patterns in DraftSight 2021 - March 24, 2021
- DraftSight 2021 SP0 Now Available - March 3, 2021