Creating a Custom Toolbar in DraftSight
In our last blog, I talked about customising DraftSight using Alias commands. Today I’m going to talk about customising the Draftsight interface by creating a Custom Toolbar. Why might you do this? Well, you can create a Toolbar with all your most commonly used commands located in the one place.
OK, so how do we start? Well, the first step is to enter Customize at the Command Window. Click on Interface and then expand Toolbars.
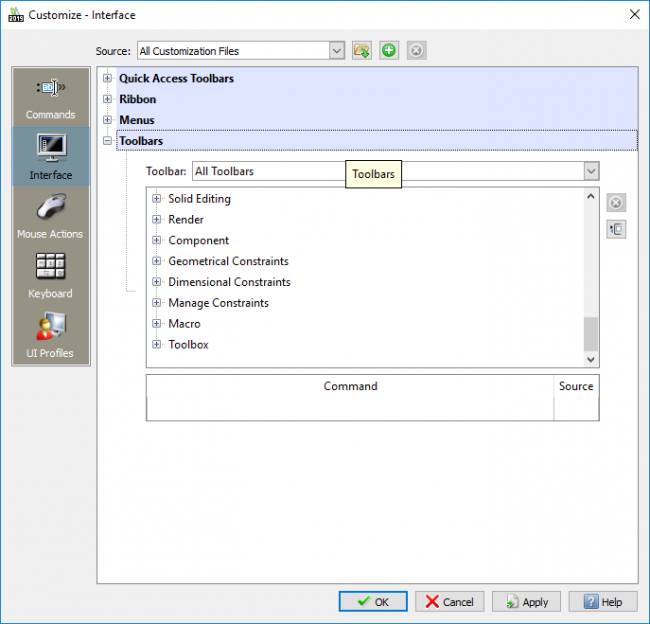
The next step is to Right Click anywhere on the Toolbar Menus and select New Toolbar.
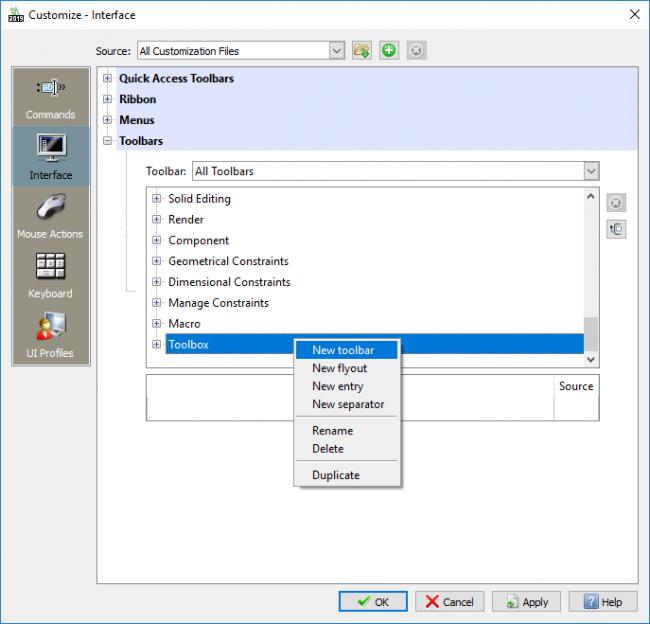
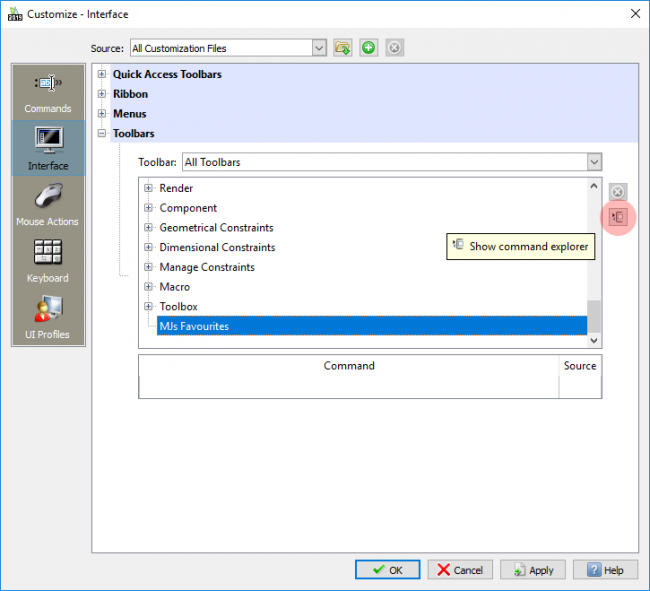
You’ll see a new item appear at the bottom of the Toolbar list called Toolbar. Right Click on this and call it whatever you would like. In my case, I’ll call in MJs Favourites.
Now we need to populate the Toolbar. To do this, click on Show Command Explorer.
The Customize Dialog Box will expand to show the Command Explorer.
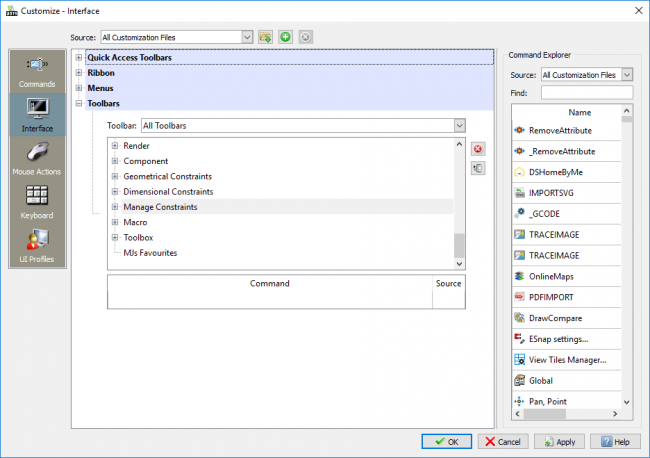
From here it’s just a simple case of dragging and dropping the commands you want on to your new toolbar. If you can’t find the command by scrolling through the list, you can enter the name in the Find field. The video below shows me adding some icons to this new Toolbar and then sorting them as I’d like.
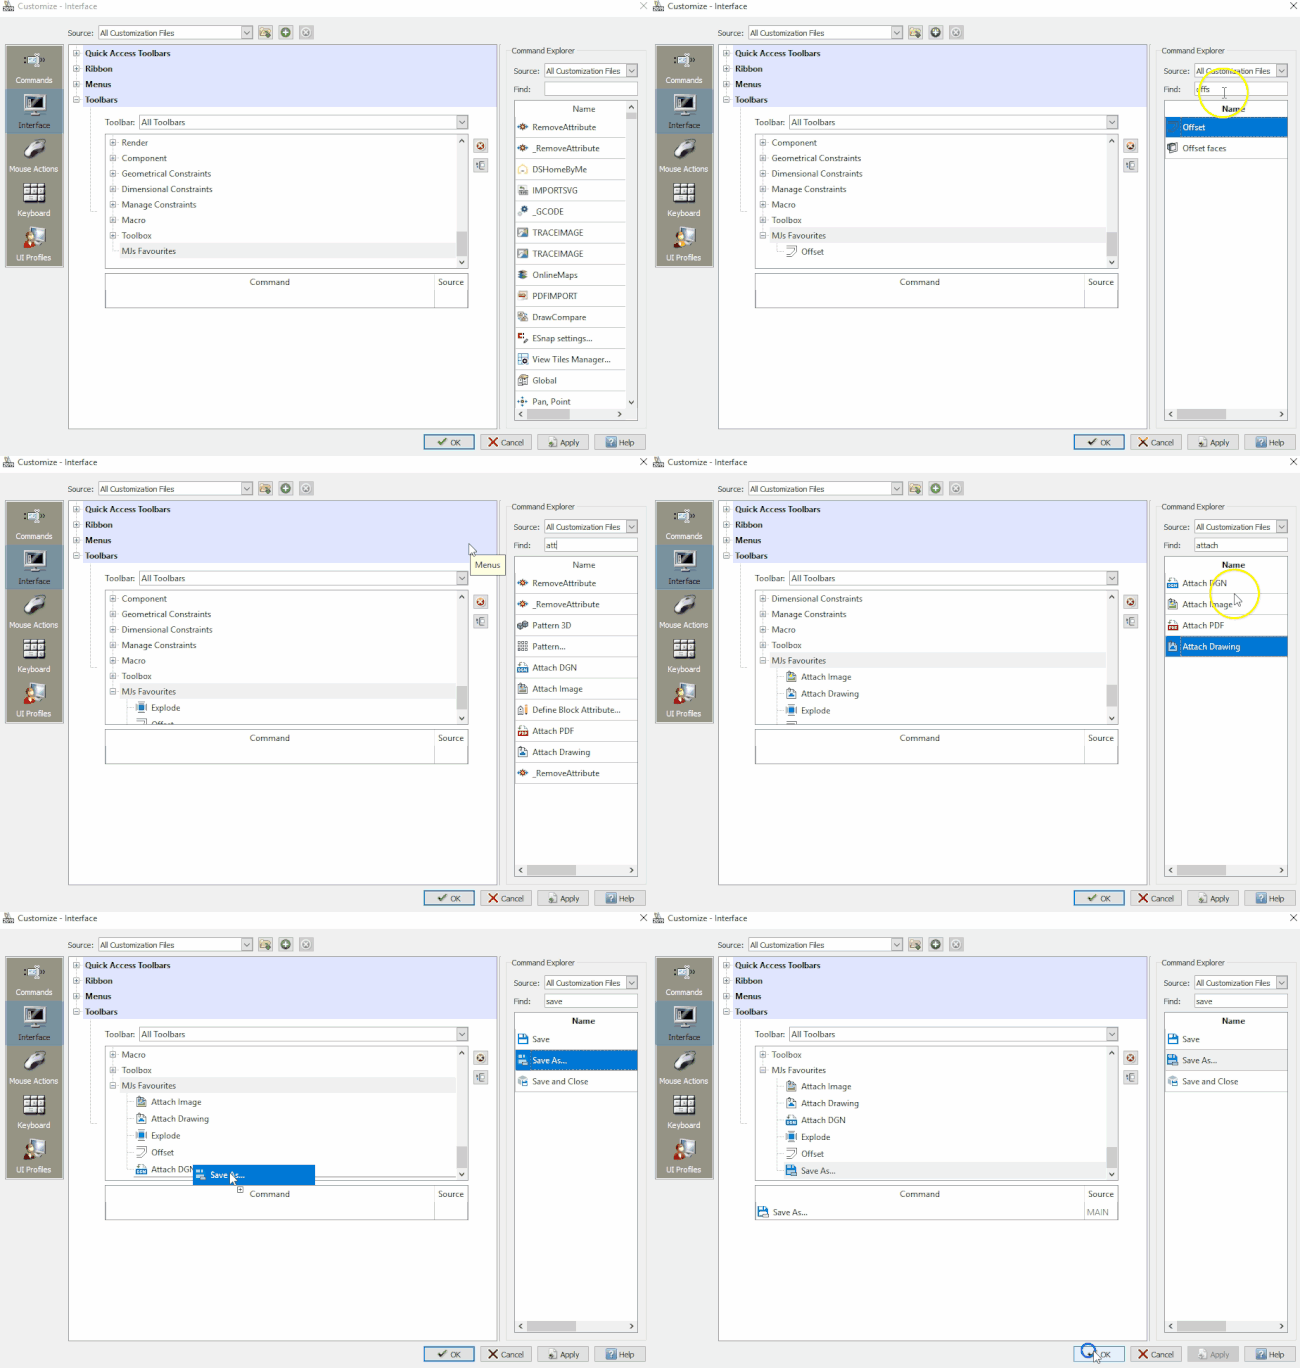
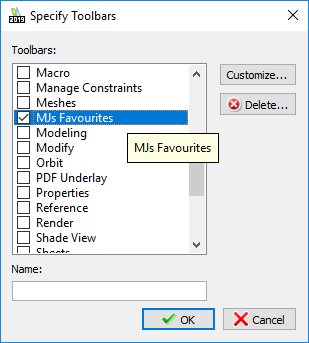
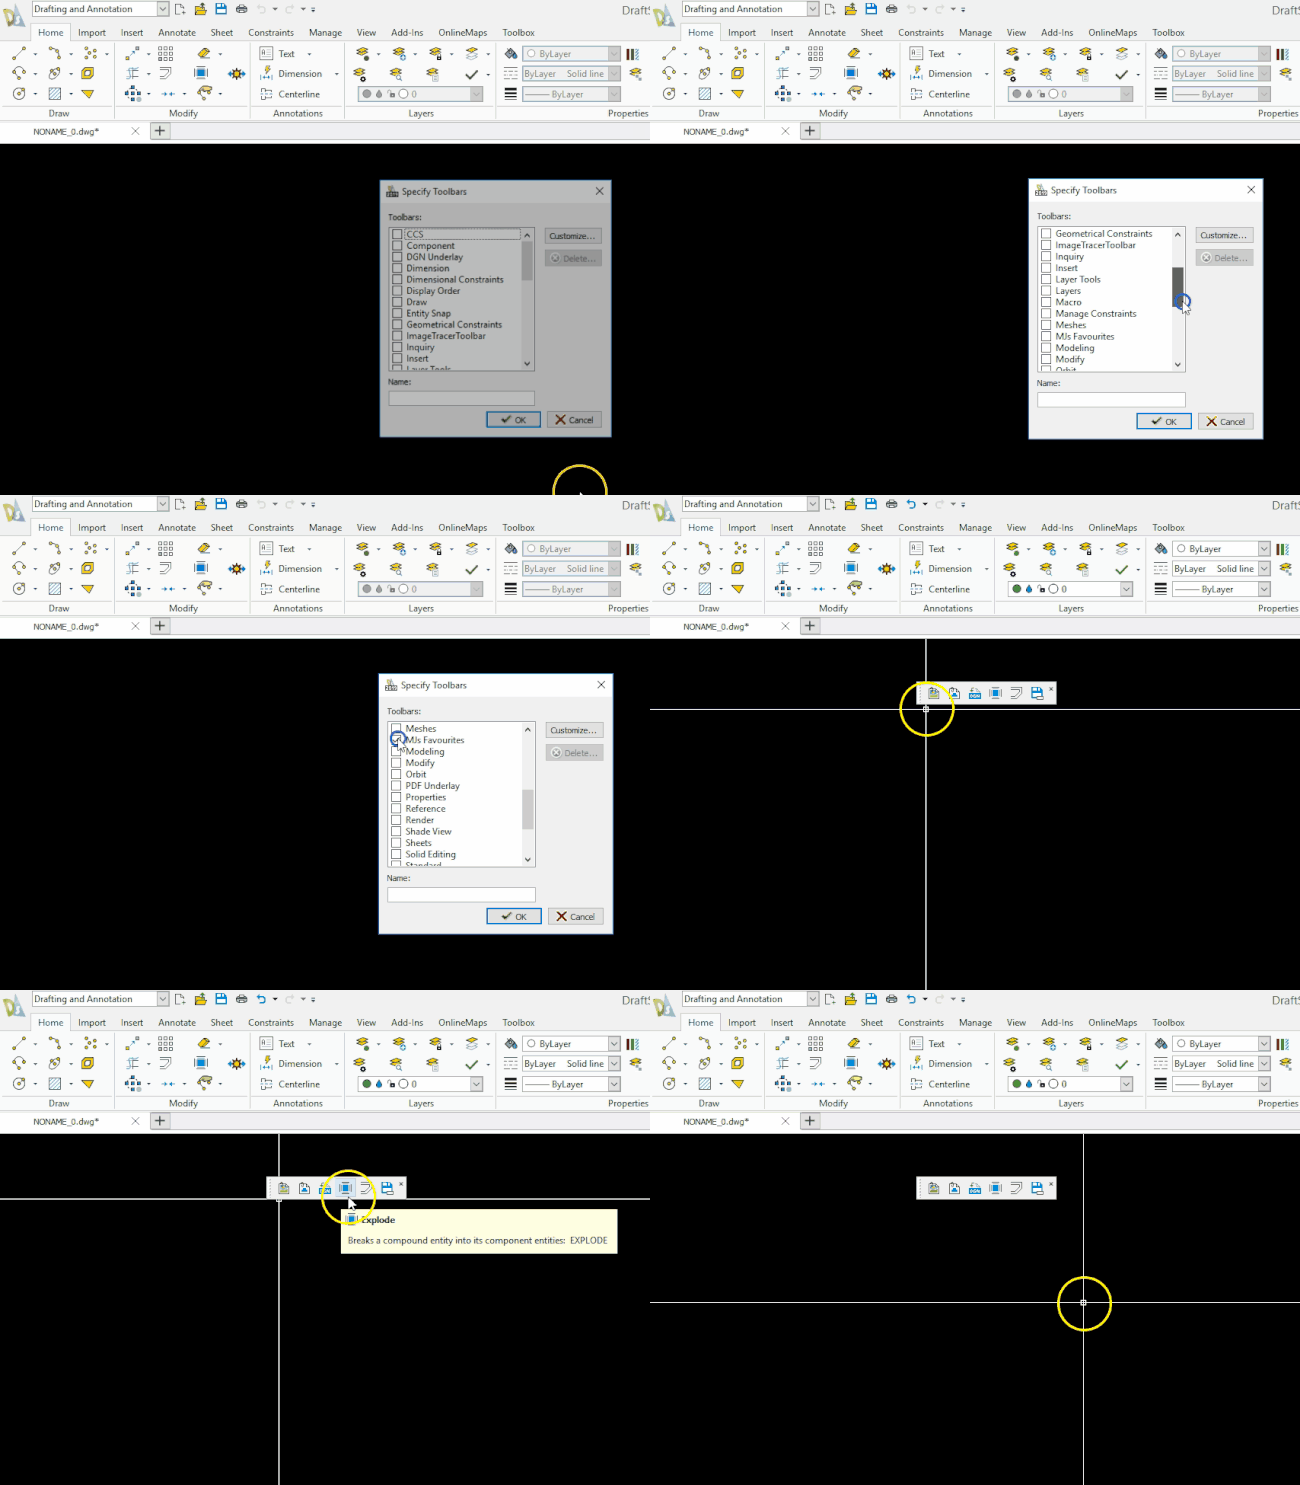
The final step is to have your new Toolbar display in DraftSight. To do this, enter Toolbars at the Command Window. The Specify Toolbars Dialog Box will open. Scroll down till you see your new Toolbar and select it, then click on OK.
Your new Toolbar will now be displayed on screen.
And that’s how to create a Custom Toolbar in Draftsight!
IMPORTANT:
DraftSight 2019 for Windows® is offered in paid versions only.
Once you download and install DraftSight 2019 (free 30-day trial or purchased version), you will no longer be able to re-download or access any previous free version of DraftSight (2018 or earlier). All free versions of DraftSight (2018 or earlier) will cease to run after 12/31/2019.
Learn more about DraftSight 2019 here.


