What is the RichLines Tool in DraftSight?
Last summer, I wrote about some cool tools that you’ll find only in DraftSight. As cool as those are, I may like it even better when one of DraftSight’s tools plain works better than its counterpart in my previously used CAD software (not that I am naming any names!). One of those is the PDF Import feature (you can read all about it here).
Today I’m going to introduce you to another one. It’s called RichLines, and you can find it tucked away under the Line command in the ribbon.

If you’re familiar with that other CAD software, you might know it as MultiLines (or MLINES), but trust me, DraftSight’s version works so much better. In fact, you might find yourself actually using it instead of being one of those frustrated Multiline users who eventually just gave up.
A RichLine Overview
If you’re not familiar with it (yet), RichLine creates multiple parallel lines that act as a single object, much like a polyline does. Unlike a polyline, though, they are created based on the active RichLine Style. Let’s start there and explore a few of your options.

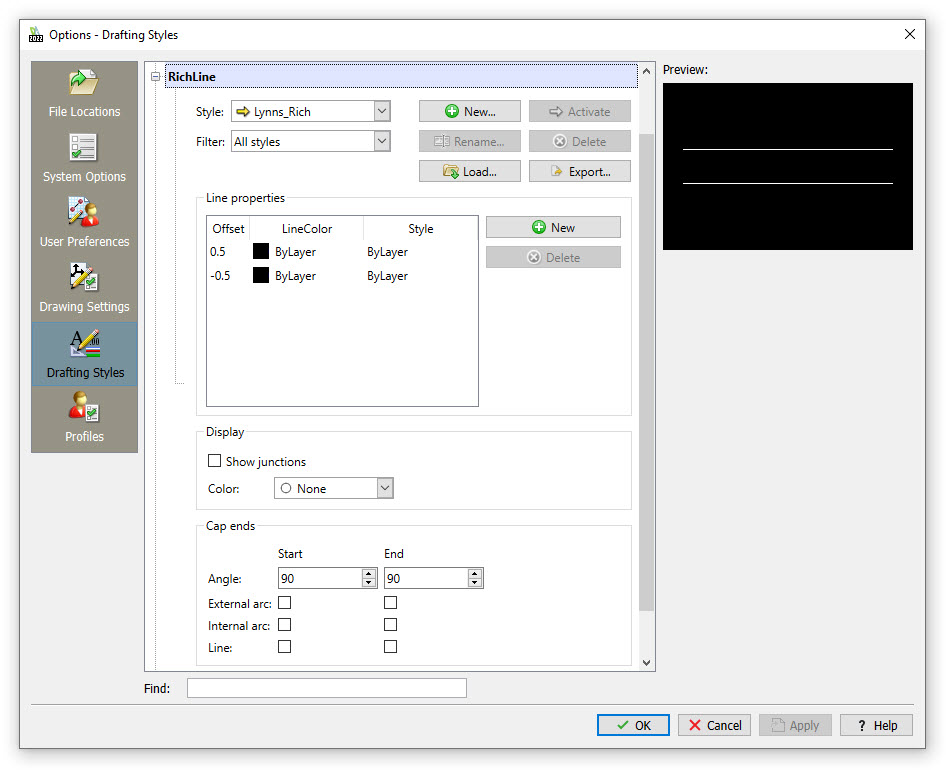
First, you can find the RichLine Style from the Drafting Styles tab of the Options dialog. Here you can manage your list of styles, choose one to set current, add/delete, etc. It even has a Load and Export function and uses the same MLN file as Mlines do, so if you created them in the past (and gave up), you can import the styles into DraftSight.
This is also where you define how your RichLine will look. The most important area is probably the properties box, where you’ll define the offset distance, color, and LineStyle. Other controls allow you to show the junctions (the lines between two vertices), set a fill color, and define end conditions.

OK, that’s a lot of good information. Maybe you’re thinking about trying them out next time you have some parallel lines to draw (a floor plan, perhaps?). But why are they so much better, you may be asking? Well, the answer lies with us being humans, and as hard as we try, we don’t always do things perfectly the first time. I know! Shocking, right? That’s where the problem comes in with the other guy’s MLINES. You can create a style with much of the same functionality as you’ll find in DraftSight.
But once you start adding them to your drawing, you no longer have the ability to modify them! It’s not that it won’t update existing MLINES, which would be bad enough, but it grays out the modify button, so you can’t even change anything. Talk about limited functionality. But (with a few limitations), DraftSight will let you change things and update your existing RichLines. So, for example, you’re half a day into creating your design, and the boss tells you to fill your RichLines in a light gray; it’s a simple change.
If you were using that other CAD software, you’d be out half a day’s work. You’d have to delete all your work, THEN fix the style, and of course, redraw everything. No wonder it frustrated people to the point of not even using it. That included me.
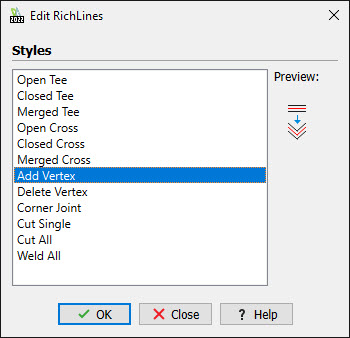
DraftSight even has a right-click editing dialog so that you can change how Tees, Crosses, Vertices, etc., are displayed. Just select your RichLine, right-click, and change! No redrawing is necessary. Thank you, DraftSight!

Summing Up
I hope I’ve convinced you to give DraftSight’s RichLines a try. They really are better than what you’re probably used to. And, despite the name, you don’t have to be rich to use them! Just go here for a free, 30-day trial of DraftSight Premium.
Perhaps you, too, will find DraftSight to be a better and more affordable solution for your CAD needs.


