Convert Inches to Millimeters in DraftSight – Part 1


When considering the differences between using Imperial or Metric units in DraftSight, it’s important to know that there are two scenarios to consider. In this first of a two-part series, we’ll focus on making sure you’re set up correctly to draw in metric units from the start. In the second part, we’ll look at the methods and ramifications of changing your units to metric during the design phase of your work.
I will lead with this spoiler alert: part one is more desirable than part two.
Setting up DraftSight to use Metric Units
The first place to start is to understand how units work in DraftSight. You’ll want to open your Options dialog and expand the Unit System section. This is where you define your units.
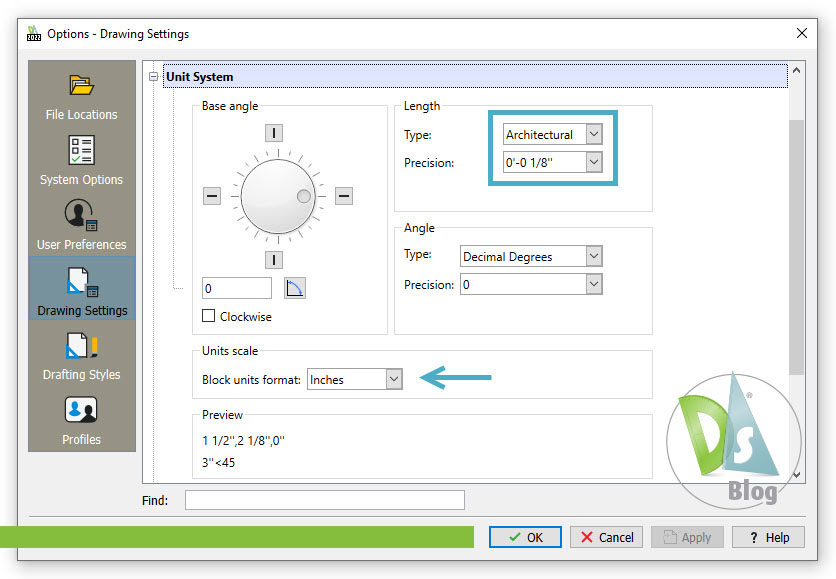
In the example below, the drawing is set to Architectural, which is common. This setting assumes that each drawing unit represents an inch and displays it in the familiar Imperial units (feet and inches). You can use either the feet/inches format or a real number when inputting a distance. Let’s say you need to specify 1 foot, six and half inches. You can enter either 1’-6 1/2” or 18.5. Either way, you’ll get the same result.
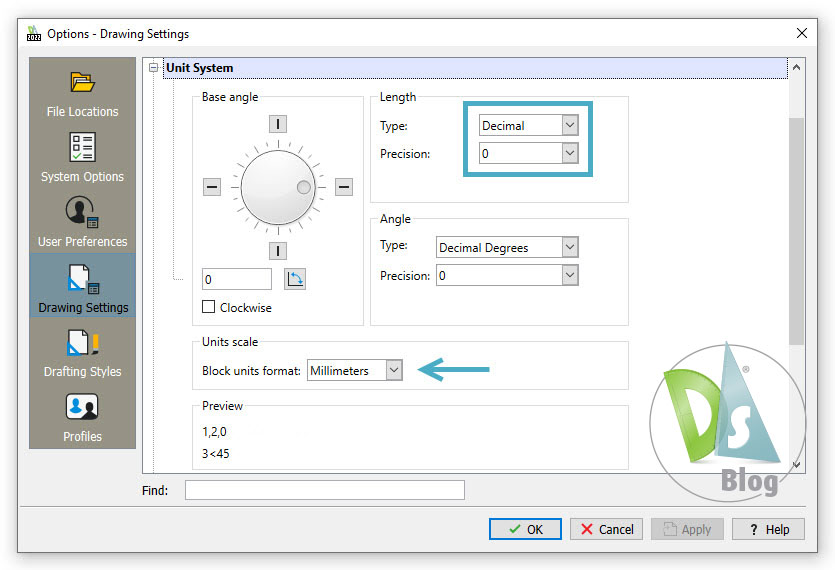
To use metric units, things are a bit different. First, you’ll notice there isn’t a Metric option in the Type pulldown. You’ll need to choose Decimal if you want to draw in metric. Here’s where you get to take control. At this point, all DraftSight knows is that it will accept numbers as a drawing unit.
In other words, you decide what a drawing unit represents. That unit designation could be literally anything, from a Plank to a Parsec. It’s just a unit to DraftSight. Since we’re setting up to use millimeters, which is what we’ll define to be a unit. So, as you draw (along with any teammates), you’ll need to remember that a unit is equivalent to a millimeter every time you (or your teammates) use the drawing. Also, it’s most common to have your Precision set to zero. If you’re using a meter as your base unit, you’d want to use three places of precision.
One other thing to note on this subject. It’s where you see the arrow in the images. It’s good practice to set the block scale format based on what your units are. Per our examples, these are set to inches and millimeters, respectively.
Summary
It is so much easier to get your drawing units set up prior to beginning a job. In fact, unless you’re only going to be working on a single drawing, we advise making these (and all other) settings in a template file. For more information on template files, you can check out our blog on that topic here.
Next time, we’ll talk about a more painful scenario: switching from imperial to metric after your drawing or project has already begun. But until then, feel free to check out our 30-day trial of DraftSight Premium. It costs you nothing, and you can get a head start on changing units and be ready when Part Two of this series is posted.
Latest posts by DraftSight (see all)
- From Napkin Sketch to Shop Floor: Why Knapheide Embraces DraftSight - July 2, 2025
- Summertime CAD Project Ideas - June 30, 2025
- Xrefs Explained: Enhance Your CAD Workflow - June 23, 2025