DraftSight’s Custom Blocks: Mirrors


In our last blog on creating activities in DraftSight’s Custom Blocks, we showed you how easy it is to create various visibility states for your block. Another very popular activity is the ability to mirror all or parts of your block’s entities about a defined axis.
Today, we will add a vertical and a horizontal flip element to our standard plan view door block. When we’re done, we’ll have two arrow grips that manage the mirror in each direction, as you can see below.
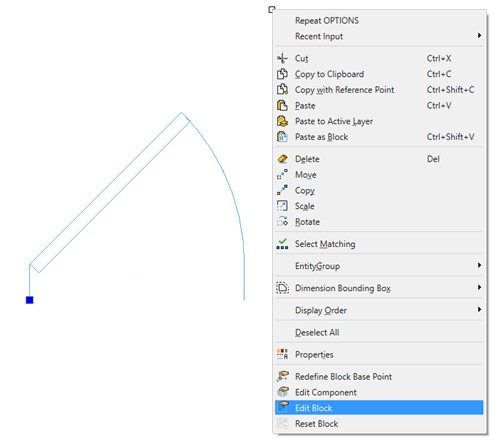
First, select the block and right-click to display the pop-up menu. Near the bottom, you’ll find Edit Block.
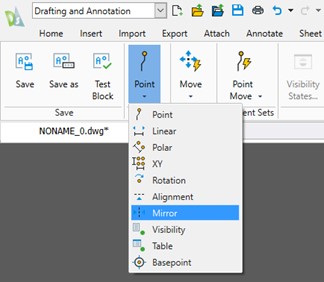
That will take you to the Block Editor. For easy identification, it has its own background color. You’ll also notice that you’ll get an extra contextual ribbon tab entitled Edit Block. All the tools you need will be found in this ribbon tab.
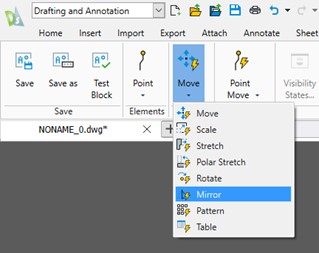
The first step to adding the mirroring capability is to add an element. All the available elements are found in the Element pulldown in the ribbon. I’ll select Mirror.
You’ll be prompted to select the base point of the mirror axis. By the way, it’s an especially good practice to keep an eye on the Command Window while creating Custom Blocks; it will always tell you what the next thing to do is.
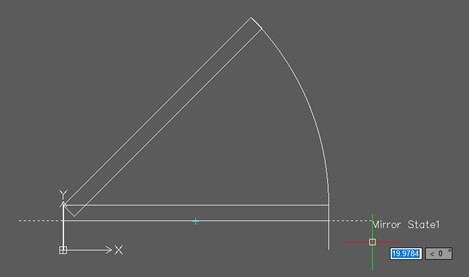
Notice that I’ve added the door in its closed state in my block. This is just to help me select the points that I want. I’ll delete it later.
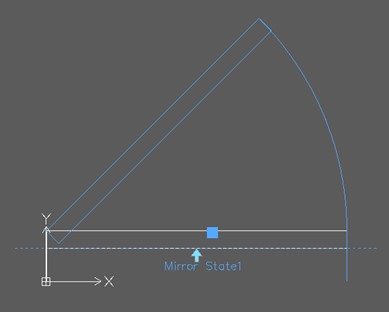
I’ve selected the bottom midpoint of the “closed” door. This is where your arrow grip will appear. Next, you’ll be prompted to specify the endpoint of the mirror axis. I have Ortho on, and I want this grip to define the horizontal mirror, so I’ll pull out to the right and click to select.
Next, you’ll be prompted to specify the label location. I’ve chosen a spot just below where the grip will be seen. The user won’t see this label, but it is important to anyone who might edit the block in the future, so it is good form to keep it nearby the grip or other element definitions.
Finally, you’ll be asked to specify the grip count. This can only be 0 or 1. Zero won’t give you a grip, and one will, so hit enter to accept the default of one.
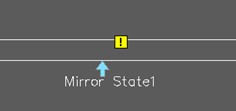
That’s it for defining your element. The element will be seen as a yellow box with an exclamation point within it. That tells you that you still need to define its activity.
You’ll find the Activities panel next to the Elements panel in the ribbon. Expand the icon within it and all available activities will be shown. Naturally, we’ll select Mirror.
You’ll be asked to specify the element currently displayed as the yellow warning. Select it, and then you’ll be prompted to specify the selection set for the activity. As you can see below, I’ve selected every entity that makes up my door except the closed part, which I will delete anyway. Click enter on your keyboard, and you’re done!
Well, almost. The warning icon will turn into the Mirror activity icon. I’ll typically move it to a good spot, similar to what I did with the label. This is also a good time to rename the label to something that makes more sense. Just double-click on it and edit it right in place.
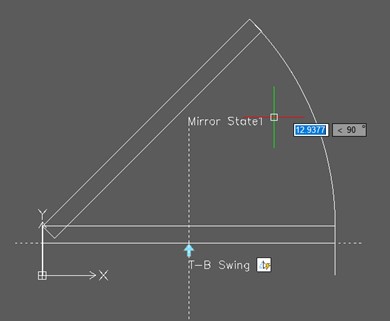
Now, all we have to do is… do it all over again! This time, though, we’re defining the vertical mirror activity, so make sure you define it correctly. Everything else works the same way.
Testing Your Block Activities
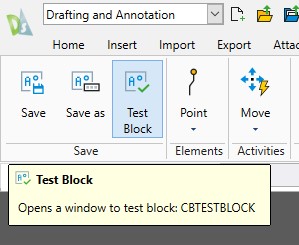
That’s it! Both mirror activities have been created, so you’re good to go. Or are you? You probably did everything right, but creating these custom controls can be tricky so making a mistake is easy. Fortunately, DraftSight has a Test Block tool for you. It’s right next to the Save and Save As tools on the left side of the ribbon.
Click on it to switch your interface into test mode. You’ll get the normal ribbon tools, and your block will be displayed. Click on the block, and you’ll see your arrow mirror grips. Click on each to test its functionality. When you’re done, click the Close icon on the right of the ribbon, which will take you back into the block editor.
Now I have just one more thing to do. Remember the rectangle showing the closed-door position? I’ll delete it now. I’ll click on the Close icon on the right side of the ribbon and make sure I tell it to save my work; the block editor will close and the main editor will be shown.
Summing Up
Defining mirror points is one of the popular controls found in Custom Blocks, and as you’ve seen, defining them is pretty straightforward. In fact, many of the activities follow the same workflow; select the proper element and define it. Then add the matching activity to it.
Keep reading our blog, and we’ll introduce you to another activity type soon.
Maybe you’d like to give it a try for yourself. Just go here to download a free, 30-day trial of DraftSight Premium and give it a go.
Latest posts by DraftSight (see all)
- From Napkin Sketch to Shop Floor: Why Knapheide Embraces DraftSight - July 2, 2025
- Summertime CAD Project Ideas - June 30, 2025
- Xrefs Explained: Enhance Your CAD Workflow - June 23, 2025