Reshaping Hatches in DraftSight: Unleash Your Creative Freedom


For the next blog in our DraftSight 2024 feature series, we will explore DraftSight’s new ability to reshape Hatches. For those unfamiliar with Hatches, they are graphical patterns or textures used to fill enclosed areas of a boundary or object in a drawing. These patterns can be represented as lines, dots, or symbols, that are employed to represent various materials, surfaces, or textures, providing a visual differentiation within the design.
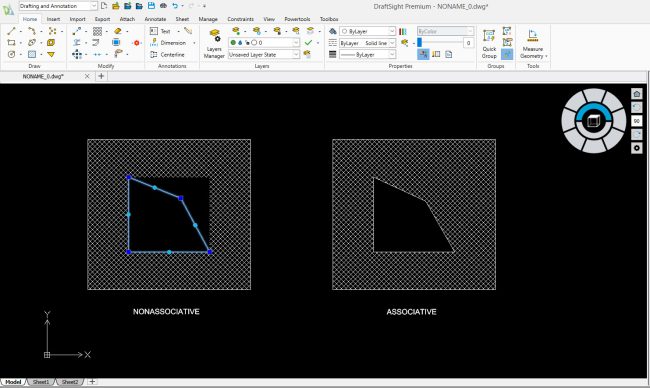
In the world of CAD, hatches are considered either associative and non-associative. With older releases of DraftSight, all hatches were associative. Meaning, they were linked directly to an object’s boundary. When the boundary changed dimensionally, the hatch would adjust to that new boundary.
Now in DraftSight 2024, we have allowed the users to disassociate hatches from their boundaries; enabling users to make a change to a boundary without changing the current shape of the hatch. The disassociated hatch will now have grips like any other object.
How do you disassociate a hatch?
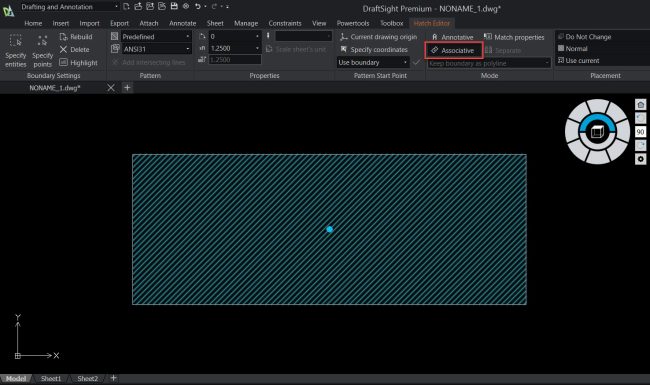
1. Click on the hatch. Notice that wherever you click on the hatch, it still acts as one object with a single center grip.
2. On the Hatch Editor ribbon, click the Associative icon under the Mode panel.
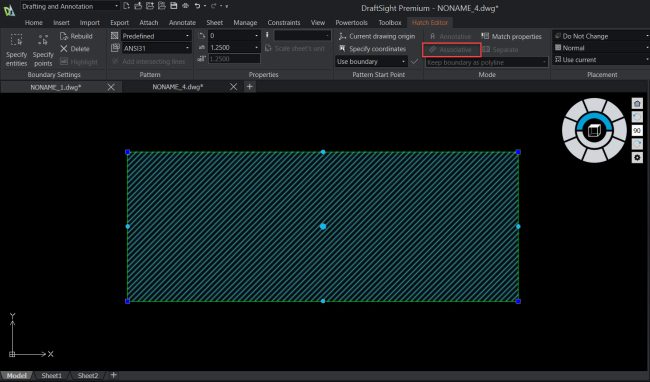
3. Now the link between the hatch and the boundary has been broken. Grip points around the hatch will be provided.
* Additionally, you can disassociate the hatch from the Properties pallet. Selecting No from the drop-down list next to Associative.

It needs to be known that once a hatch has been disassociated, it cannot be re-linked back to its original boundary. After disassociating a hatch, you need to change the hatch mode back to associative if you want to create a new hatch that is associative.
How to associate a hatch?
1. Type in Hatch in the command window or click on the hatch icon.
2. On the Hatch Creation ribbon, click the Associative icon under the Mode panel. Make sure the icon is highlighted in blue under the light mode UI and highlighted in black under the dark mode UI.
3. Now there is link between the hatch and boundary. A single center grip point will appear when clicking on the new hatch indicating it is associated.


In conclusion, the ability to reshape hatches in DraftSight empowers designers to take their creativity to new heights. The flexibility and precision offered by this feature contributes to more visually engaging and communicative drawings.
Keep an eye out for our next blog post in this series, where we’ll be revealing the thrilling new features of DraftSight 2024. If you haven’t had the chance to discover the capabilities of DraftSight or are looking for more information on the latest enhancements in DraftSight 2024, please visit our website or sign up for our free 30-day trial. No obligations, no need for a credit card. So, try it out, and unlock the potential today.
Brian Vanasse
Latest posts by Brian Vanasse (see all)
- DraftSight: Enhancing Industry Collaboration with the 3DEXPERIENCE Ecosystem - November 19, 2024
- Reshaping Hatches in DraftSight: Unleash Your Creative Freedom - January 18, 2024
- Enhanced Organization with Merge Layers - December 20, 2023