Creating a Visor Headband in DraftSight – Download the Design Files Ready for 3D Printing


Create this visor now by downloading the design files here, opening in DraftSight Premium and sending to a 3D printer.
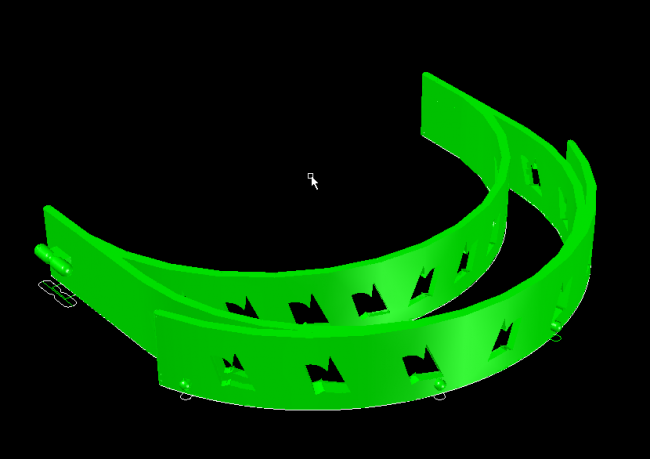
In last weeks blog, we spoke about the lack of Medical PPE (Personal Protection Equipment) worldwide and how DraftSight® users may be able to help. DraftSight Premium allows the creation of a three-dimensional model for a Visor Headband. This model can then be exported from DraftSight Premium as an STL file that can be printed with your 3D Printer.
To create the visor, we started with a 2D base drawing, which was then extruded to create the three-dimensional shape. The total time from the start to finish for this project was only about 30/35 minutes.
Download the design files here from the Open COVID-19 community on the 3DEXPERIENCE platform. You can access it free today using your SOLIDWORKS ID or 3DEXPERIENCE ID (which is easy to create).
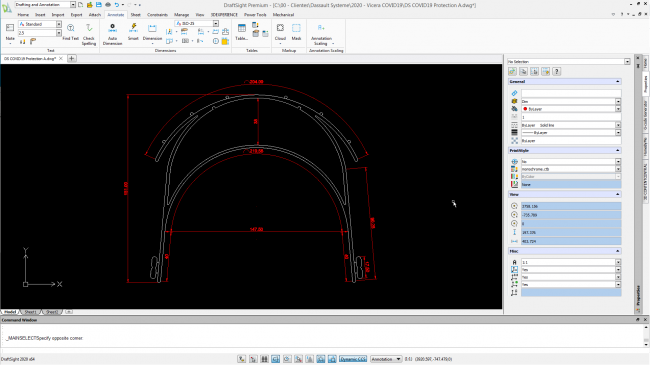
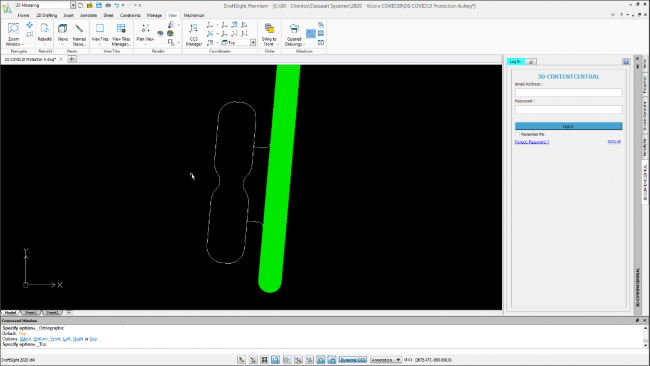
After extracting the files, open DS COVID19 Protection A.dwg in DraftSight Premium.
Next, turn off the “DIM” layer. We don’t need to see the dimensions at the moment. The drawing itself is quite simple, it is just a combination of Lines, Polylines, and Arcs. Our first objective is to create Closed Polylines, starting from the existing entities. (Since this is a symmetrical model, you could just do one half, Mirror it and then Join the two halves together.)
Why do we need Closed Polylines? Well, we need them to create Solid Entities in DraftSight Premium. There are two ways to do this, we can draw over our existing entities and create new Closed Polylines, or we can use the Boundary command on the current entities and use that to create the Closed Polylines. Sometimes, although a 2D shape may seem closed, it may not actually be the case. Sometimes there might be a slight imperfection that you didn’t notice (often with models from a 3rd Party). With this in mind, experienced 3D modelers resort to tricks that ensure the success of the model from the beginning of the project.
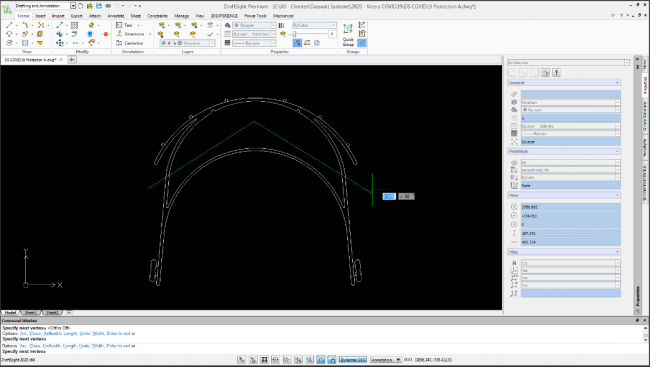
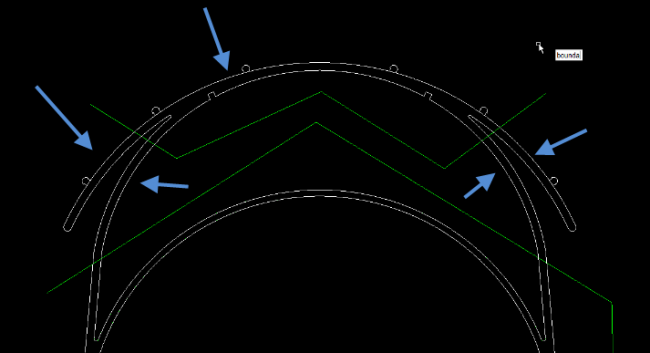
So, with that in mind, the next step is to draw Lines or Polylines that divide our model into different parts.
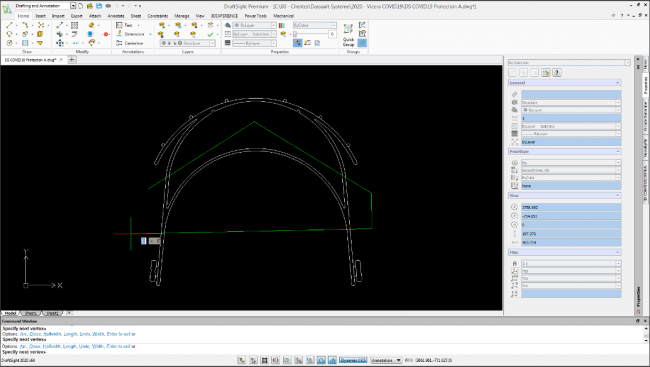
Why? Well, when we go to use the Boundary command, it will be far easier to detect any area that is not closed correctly. Remember that the Boundary command allows us to create a Closed Polyline as long as we click inside a closed space. Similar to how the Pattern command works.
Next, we create a multi-segment Polyline to further divide the top area of the drawing. As you can see in the image below, we have transformed one single closed zone into 5 separate zones. As I previously said, we are doing this simply because it is easier to detect if there is an open area that will stop the Boundary command from creating a Closed Polyline.
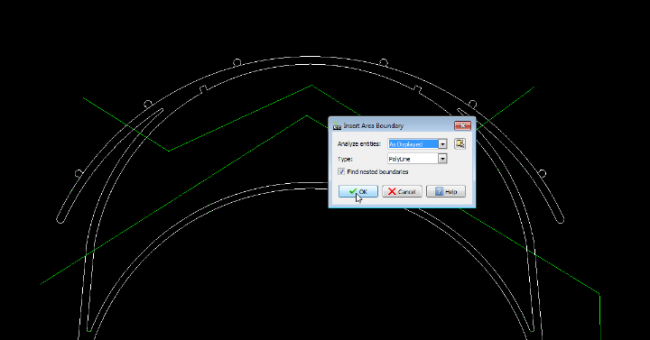
So, using the Boundary command, we create the Closed Polylines by clicking inside the different areas.
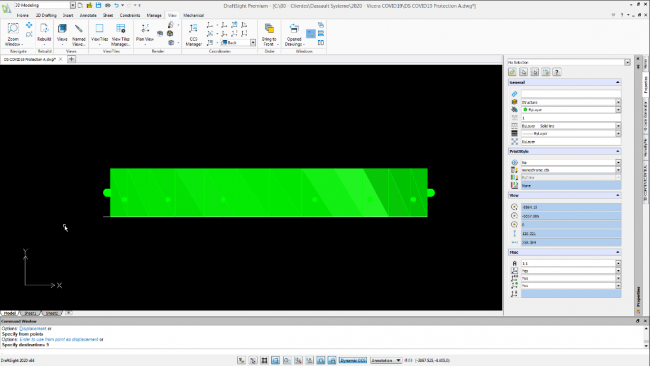
Next, we are going to Extrude the Closed Polylines. We’re going to switch to an Isometric View to do this as it will make the drawing window easier to work in.
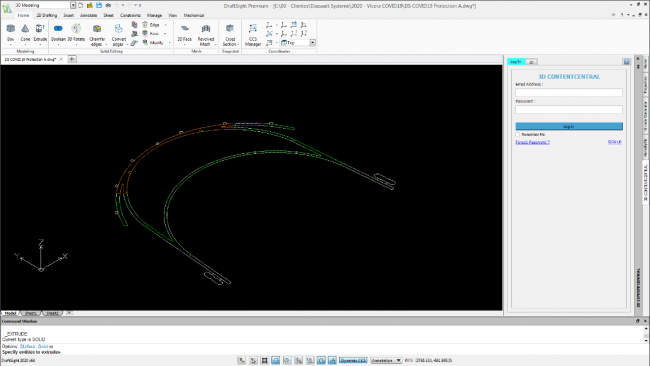
The Extrude command can be found in the 3D Modelling menu DraftSight Premium 2020. You can also enter it in the Command Prompt. I’m old-school, so I tend to use the Command Prompt for nearly everything!

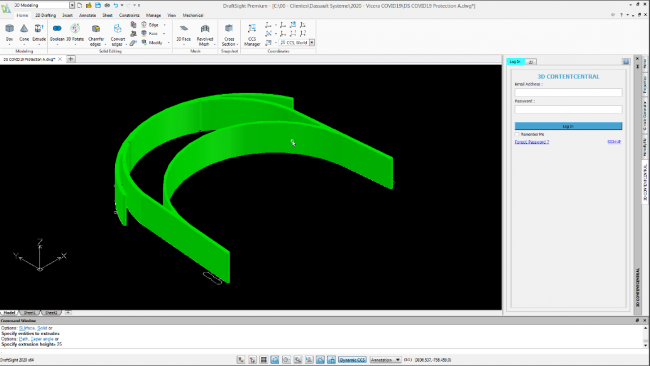
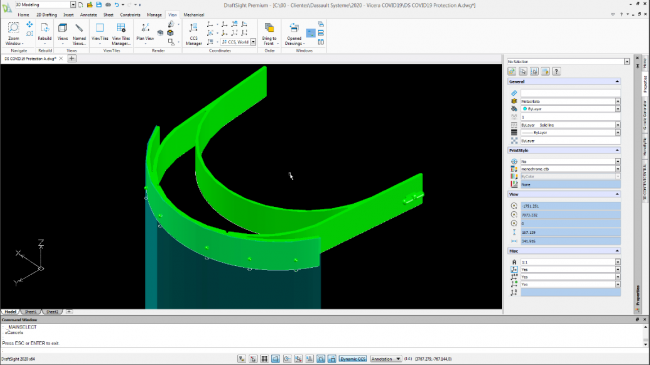
We can extrude all of the Closed Polylines at once. Each extruded Polyline will obtain a solid entity. In the end, we can join all the solids we create with the Join Boolean command and create one single solid object.
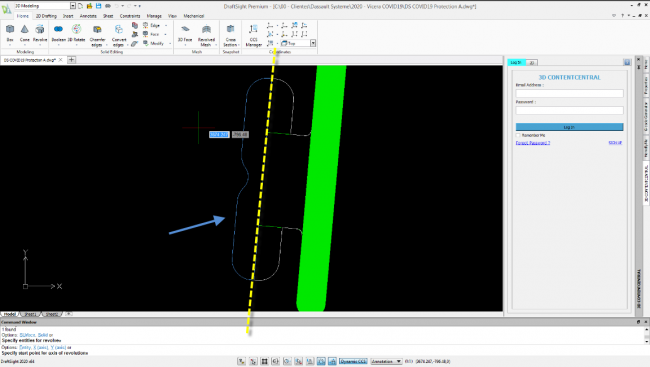
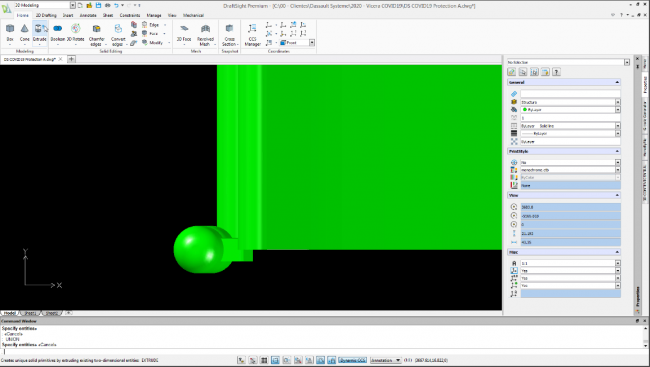
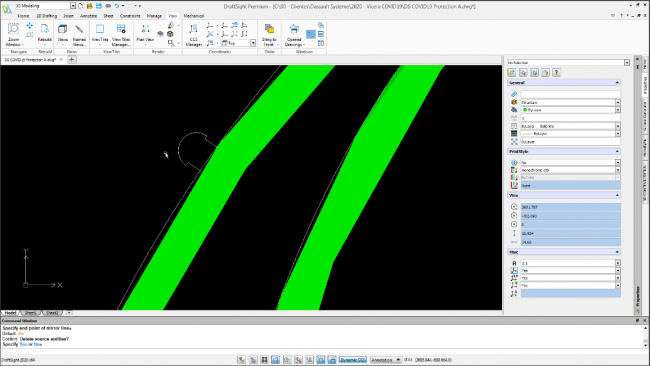
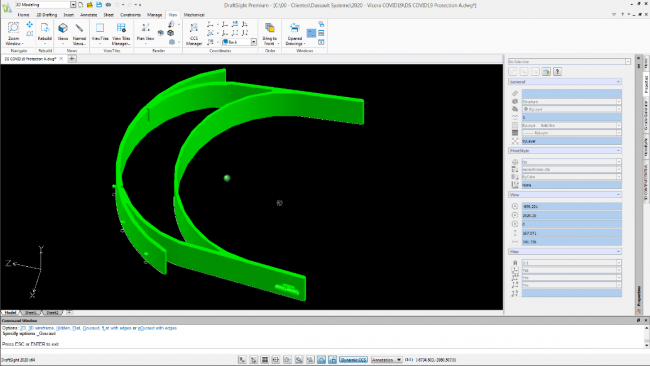
At the end of the arms, we will find a vaulted capsule shape. We are going to create another solid using the Revolve command.
To do this, we need to create a Closed Polyline around half the shape. Then, using the Revolve command, we will revolve it 360 degrees to create our desired shape.
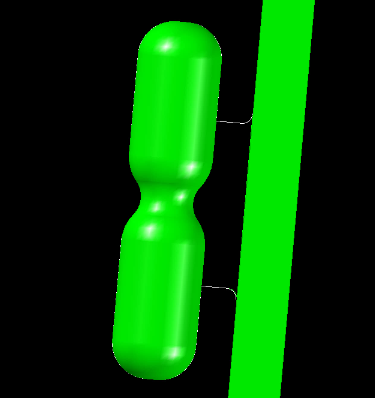
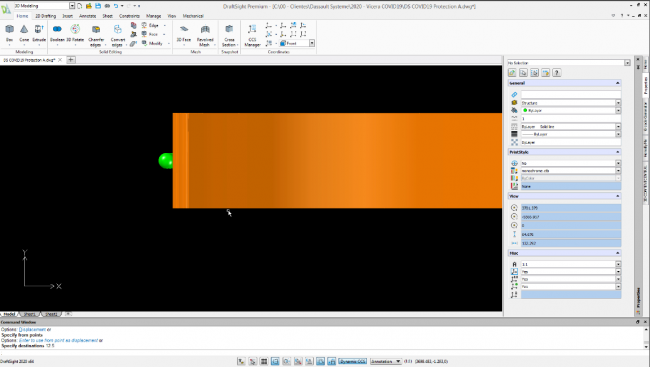
As you can see in the image above, we need to create a piece that connects to the arm of the PPE Visor Headband. To do this, we only need to extrude a Closed Polyline. This element is the hook of our PPE Visor – where an elastic strap can hook to keep the visor tight on the head of the user.
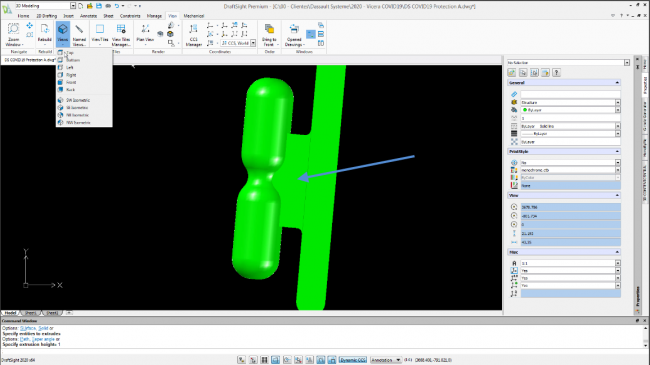
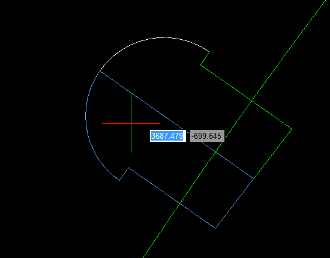
If we take a look from a front view we can see that the hook has been created on a different plane than the one we need it on.
To place it in its final position we simply use the Move command.
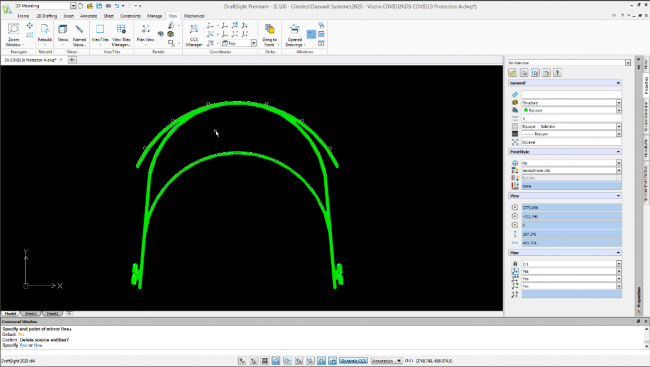
Rather than doing the work again, we can Mirror the hook to place it in the correct position on the the other side of the Visor.
On the front we will find the hooks for the Methacrylate Visor.
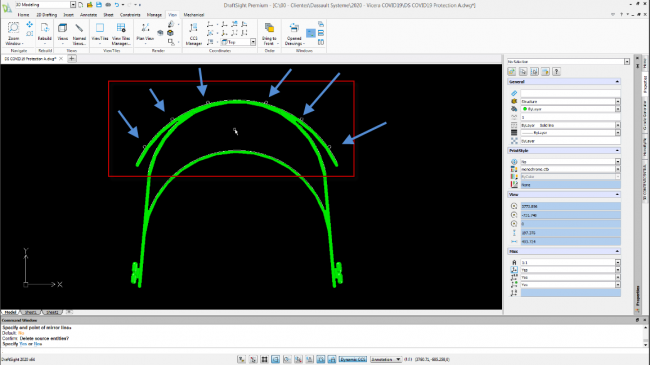
Again, we create a Closed Polyline for half the shape. Then we use the Revolve command to create the solid entity.
Again, we need to use the Move command to place these new hooks into their correct position.To do this, we will switch to a front view.
The hooks are used to attach the transparent visor to the headband.
Learn more about the 3D capabilities in DraftSight Premium which was used to create this PPE Visor Headband.
You can download our 3D model in both STL and DWG here.
Learn more about DraftSight here.
NOTICE:
We encourage anyone who is using DraftSight to contribute to COVID-19 relief efforts, including use of this visor, to reach out to us in the comments or social media to share your stories.
Latest posts by MJ Smyth (see all)
- Resetting DraftSight to Default Settings - April 12, 2021
- Associative Patterns in DraftSight 2021 - March 24, 2021
- DraftSight 2021 SP0 Now Available - March 3, 2021