Cool Tools in DraftSight with Lynn Allen
Today I want to introduce you to some tools that you’re going to wish your current CAD product had but are only found in DraftSight. I picked my top five to show you, and I think once you see them, you’ll have a bad case of “feature envy!”
PowerTrim
My personal favorite, PowerTrim, allows you to quickly and accurately trim multiple entities by simply dragging your pointer across them.
Since PowerTrim automatically considers everything in your drawing to be a cutting-edge, you can save time and lessen your frustration by not having to identify and select those entities individually. You literally just hop in and start trimming!
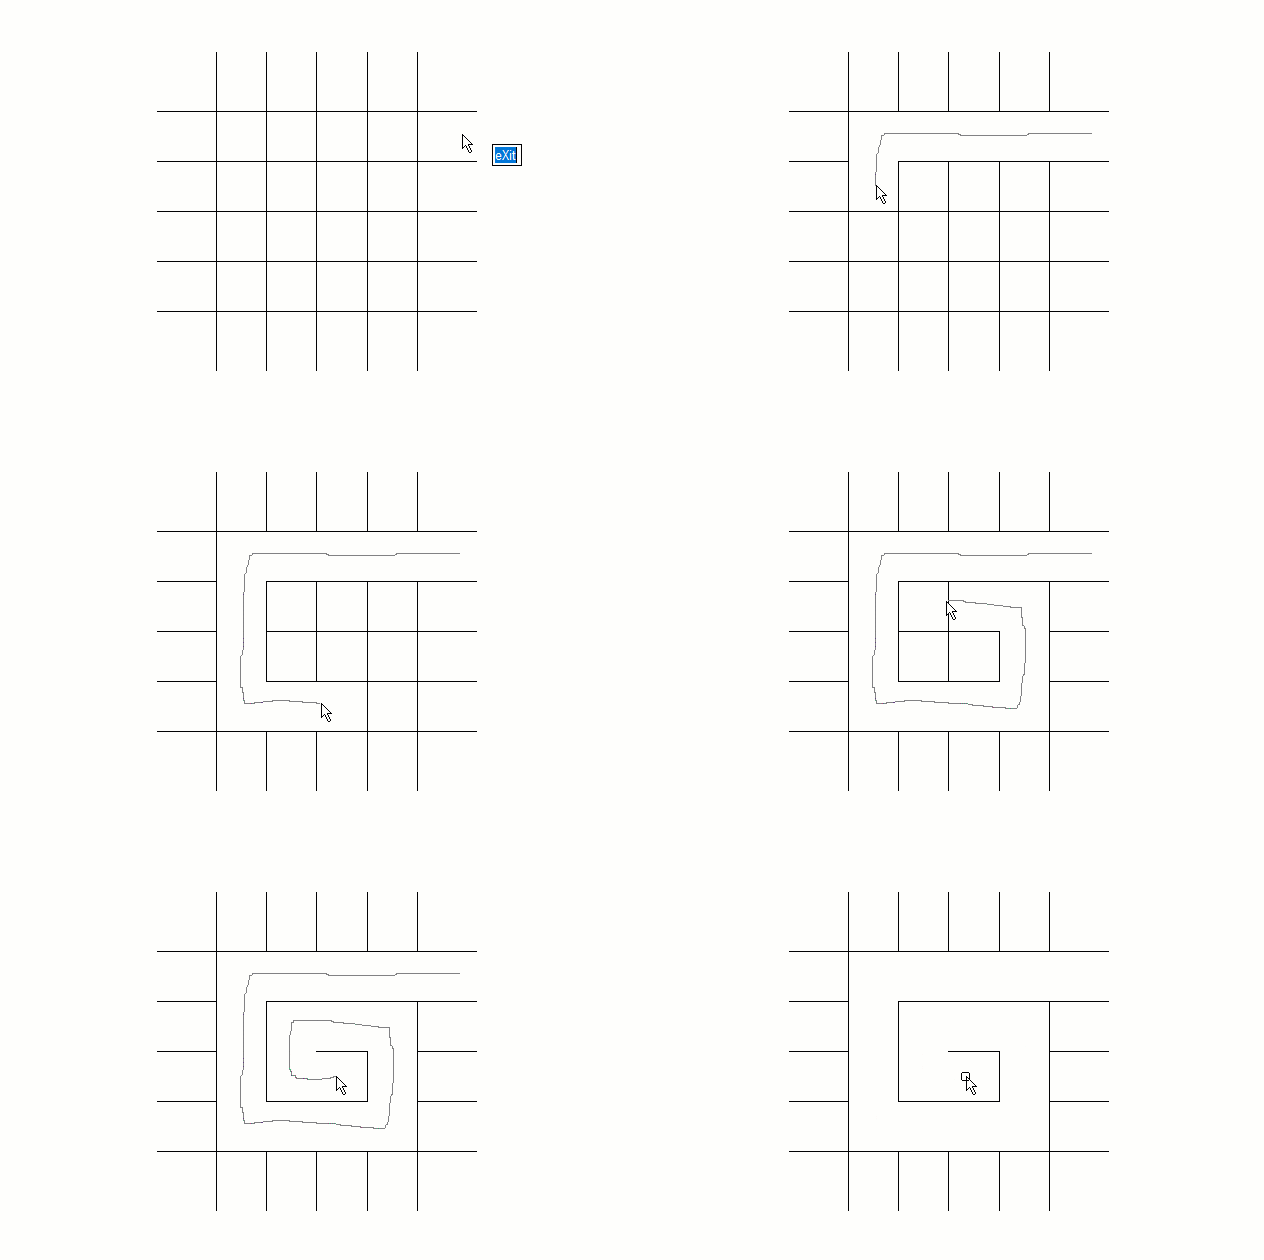
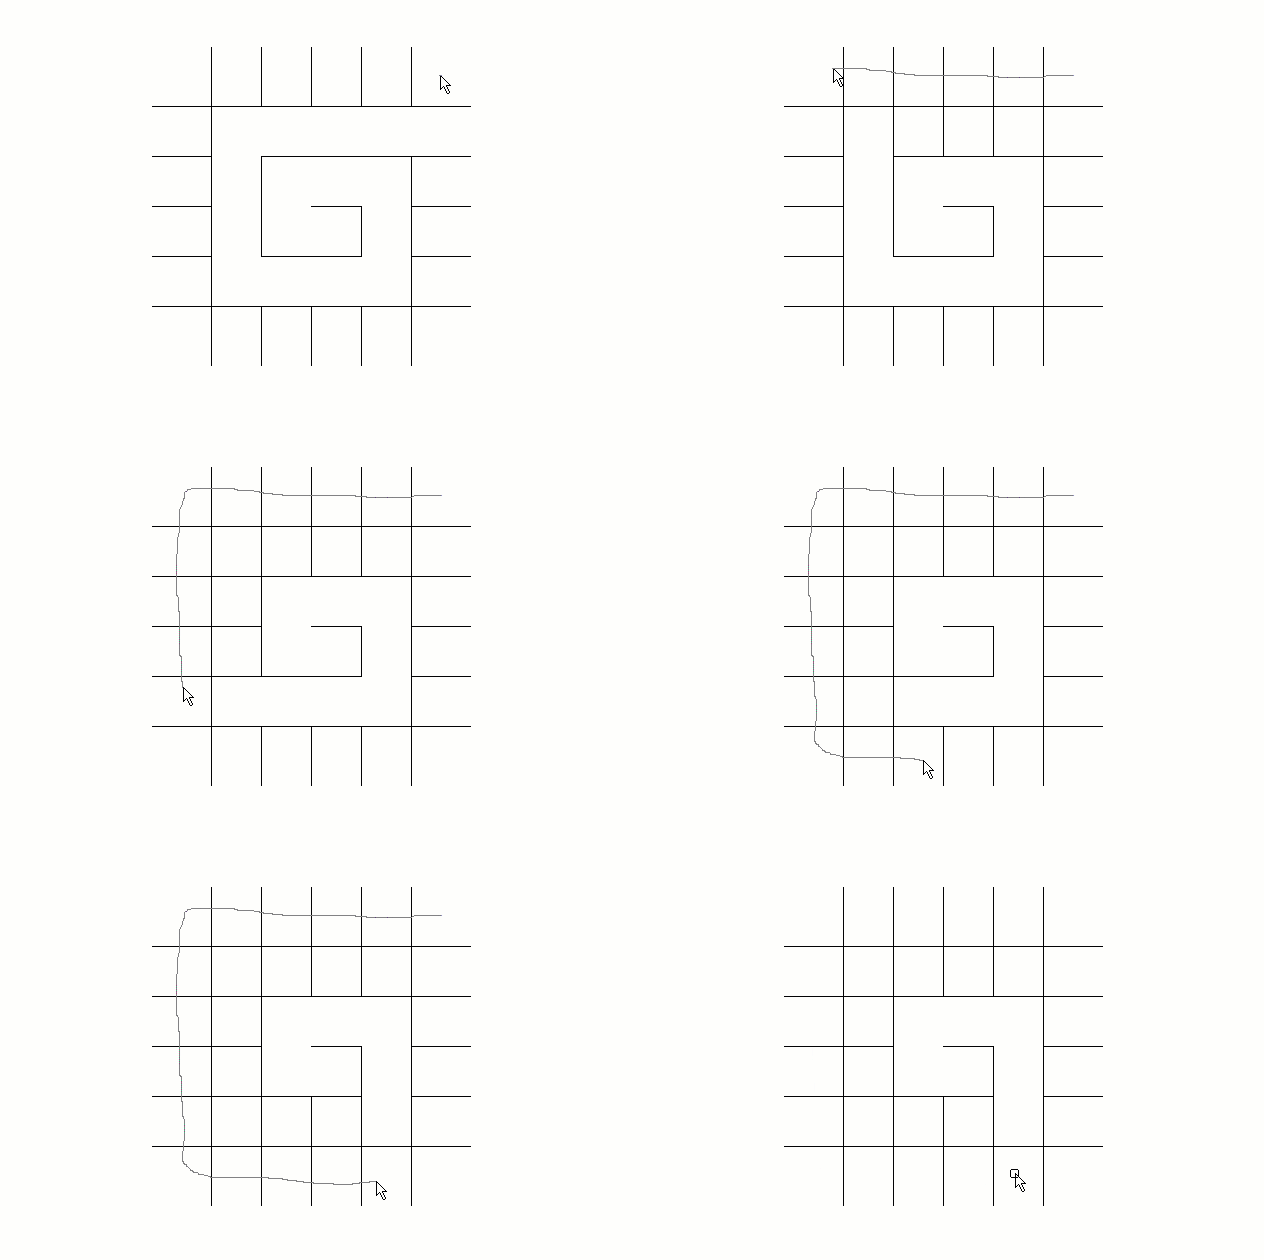
You can even change the behavior of PowerTrim to PowerExtend entities in the same manner, simply by holding down the Shift key on your keyboard.
Finally, if you select an individual entity, you can use PowerTrim to extend or shorten it along its current path. You can also let it do the work of finding and extending to an inferred intersection point by selecting a second entity.
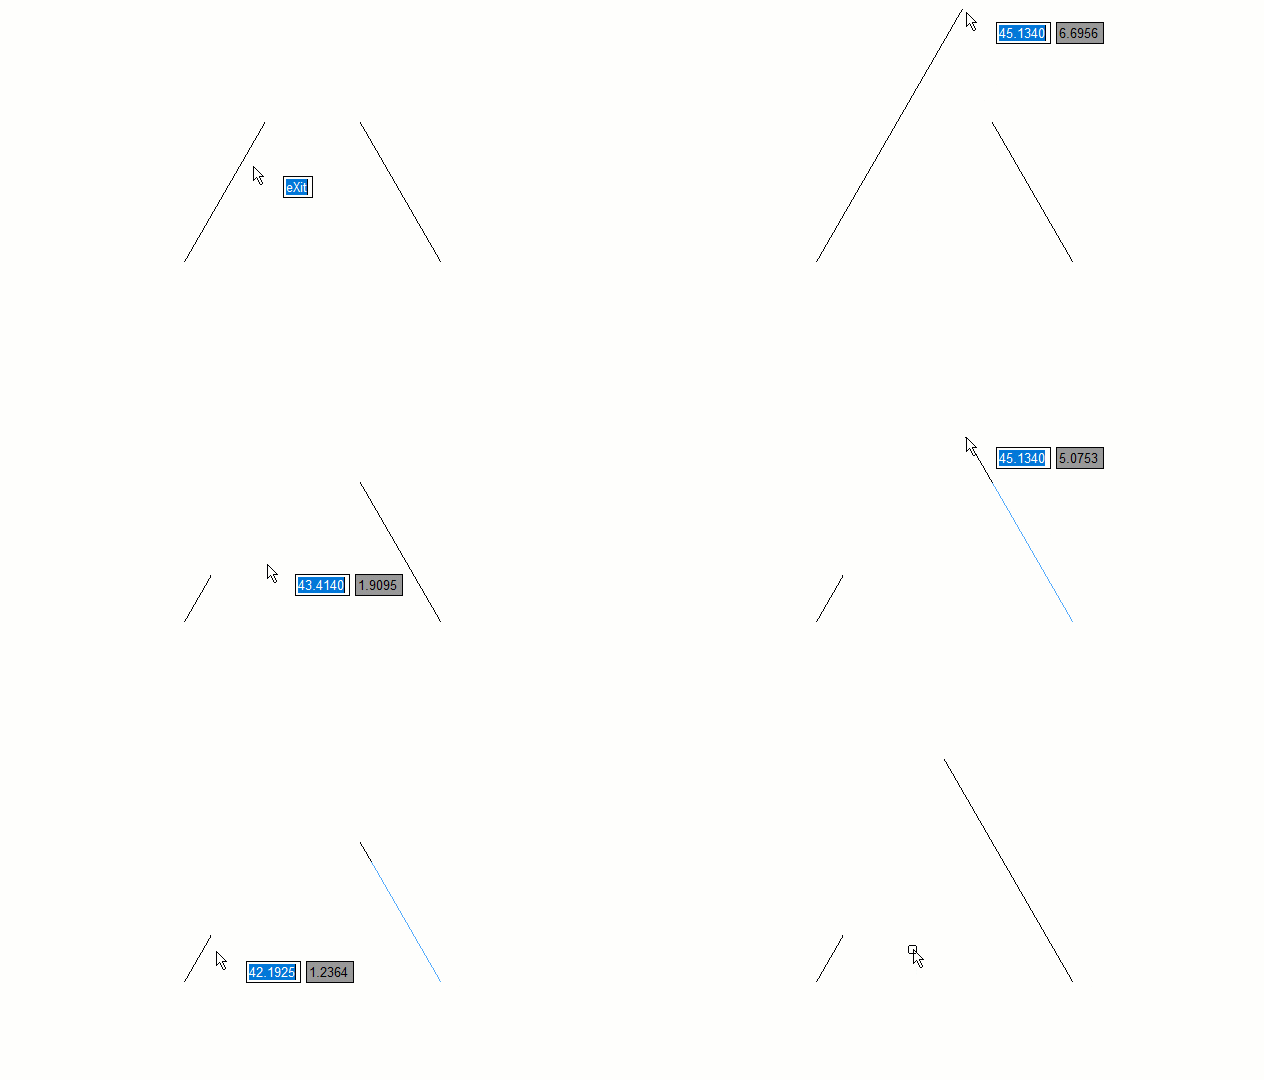
How’s that for a four-in-one tool? By using PowerTrim in DraftSight, you can get a lot more done in a lot less time, and who doesn’t like that?
Toolbox Layers
DraftSight contains an entire suite of Mechanical tools and symbology that will help you standardize your Mechanical drafting needs. If your design needs include industry-standard holes and fasteners, weldments, finishes, callouts and BOMs, you’ll be thrilled to know that it’s all built right in.
“But Lynn”, you’re saying… “that doesn’t help me, I’m in architecture.” Well, there is a part of the Toolbox that everyone can use, and it can really help you maintain your CAD standards. It’s call Toolbox Layers, or TB Layers for short. It allows you to map the layer of your choice to any type of DraftSight Entity. You can even specify the LineColor, LineStyle, or LineWeight if you want.
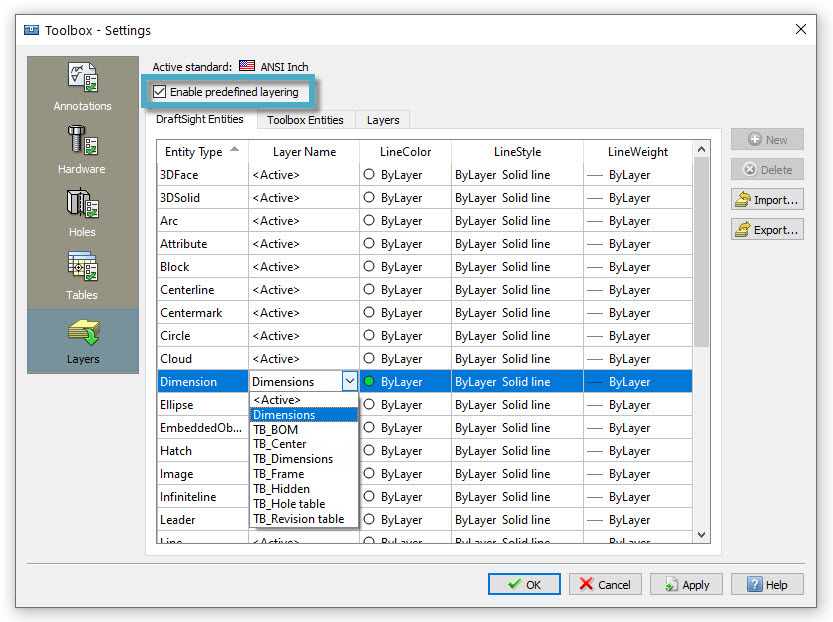
Imagine how much time you’ll save by not having to switch your active layer every time you decide to draw a new type of entity. Your dimensions will always be on the right layer. The same with your tables, hatches, viewports, centerlines, etc.
With TB Layers enabled, you won’t have to interrupt your workflow just to activate a new layer, which can keep your mind on the task at hand, which of course increases your efficiency and can help improve your design.
Auto Dimension
I’ve always wanted an “easy button” for dimensioning. Something that lets you just select an area around your drawing, and Bam! The software does the work for you. Guess what? DraftSight lets you do that, and it’s appropriately called Auto Dimension.
Simply select the entities you want to dimension with a Bounding Box, then set various options in the Auto Dimension palette. For both Horizontal and Vertical Dimensions, you can specify whether they’ll be Baseline, Continuous, or Ordinate dimensions. You’ll also need to decide if you want the Horizontal dims to be placed above or below the bounding box, and whether the Vertical dims are to the right or left.
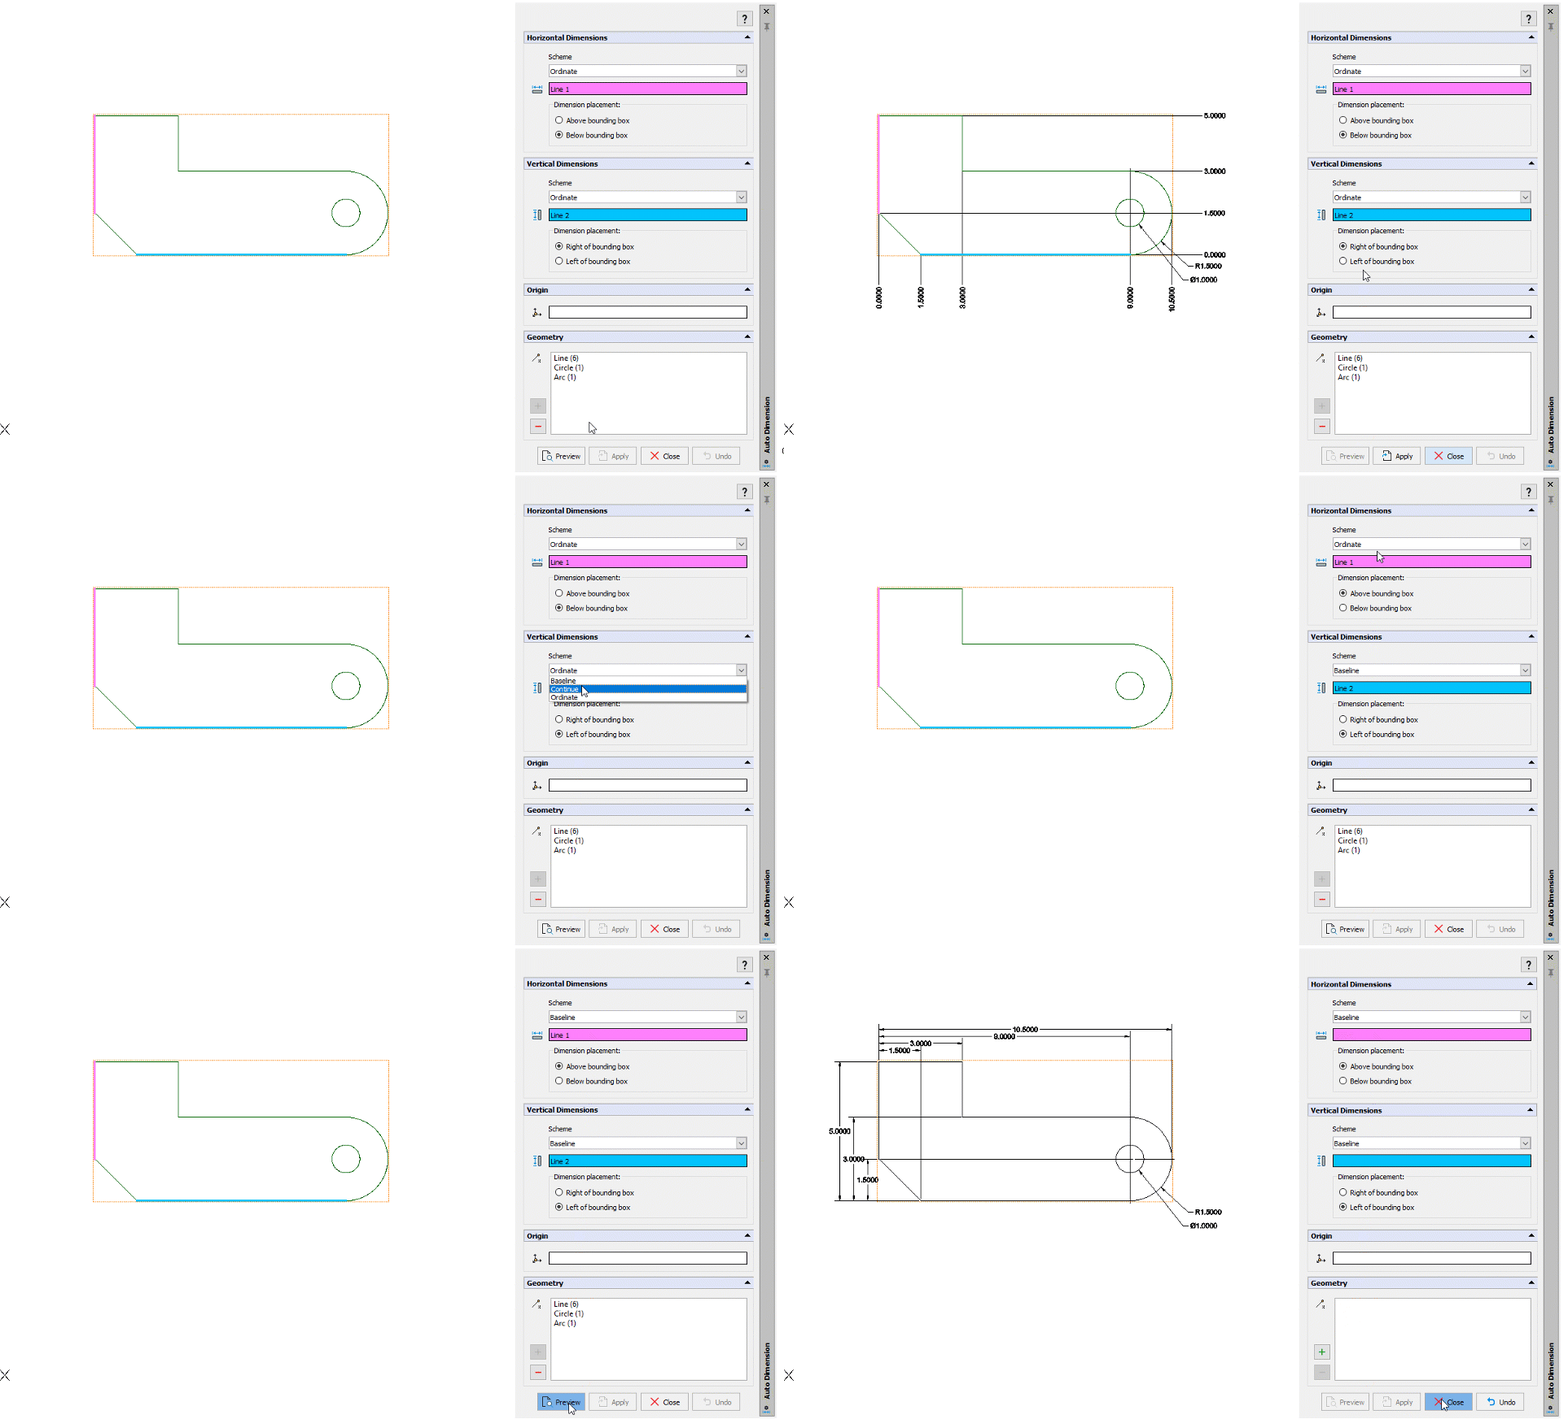
Feel free to try different schemes and positioning. Nothing is set in stone until you accept the Preview by clicking the Apply button.
Image Tracer
The DraftSight team and I have both written about the fantastic job that PDF Import does in DraftSight. But what do you do if you need to convert some other kind of image files like JPGs or PNGs into CAD entities? Some vendors have separate programs that can do this, but with DraftSight it’s built right in!
It’s called Image Tracer and based on the number of tweets and messages that I get, it’s one of our users’ favorites.
Image Tracer allows you to select an attached image, do some basic settings to control how you want it to end up, and then the image becomes vectors. How powerful is that? I know you’ll appreciate it if you’ve ever had to convert an image of a company logo into a DWG file. You can even use your favorite screen capture program to take a screenshot, save it to a JPG, and quickly turn it into a usable CAD file.
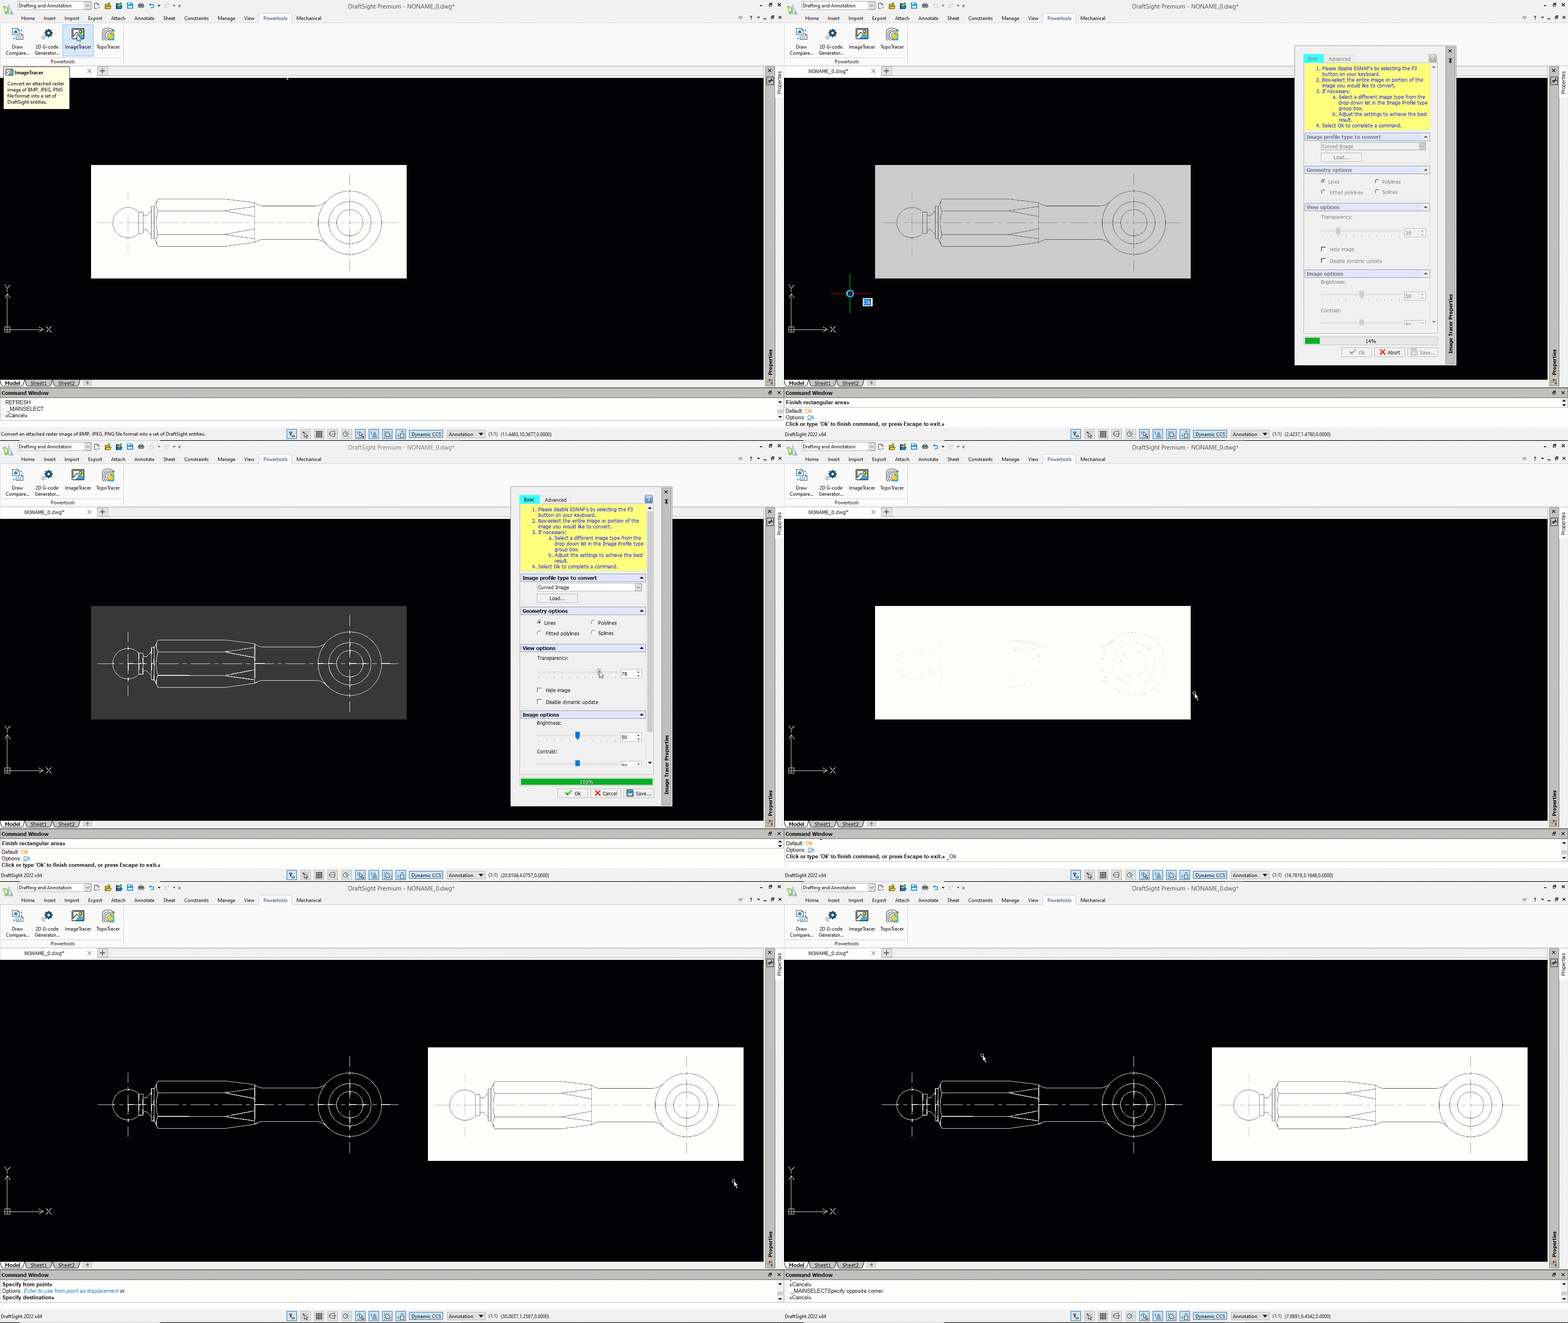
So why use a separate product to do what’s already in DraftSight? Personally, I don’t know of any good reason. Image Tracer is super easy to use, extremely powerful, and it’s built right in. No wonder it’s a DraftSight user favorite!
Mouse Gestures
Found only in DraftSight, Mouse Gestures provide a fast and convenient way to speed up your drafting technique.
When it’s enabled, you can access various commands by simply holding down the right mouse button and moving the mouse in the proper direction.
Warning: You could become addicted to using Mouse Gestures!
DraftSight allows either four gestures, which correlate to moving the mouse up, down, left, or right, or eight gestures, which add the diagonal directions.
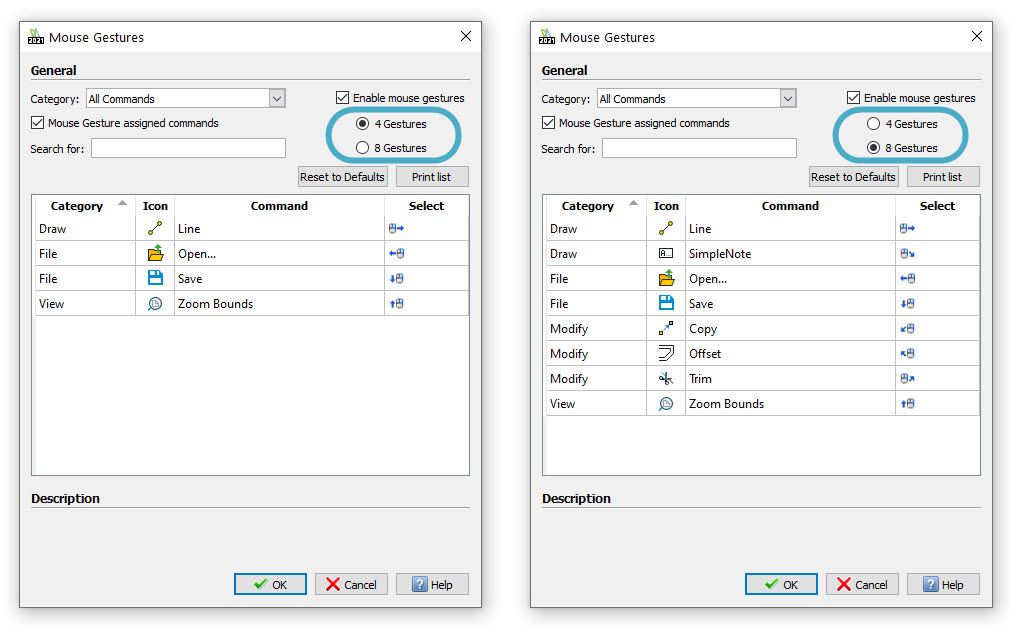
Each Gesture has a default command, but the real power comes when you customize them. By mapping your most frequently used commands to a gesture, you can remove the need to navigate through a menu to click on its icon.
To execute a Gesture and display a Gestures Navigation wheel, simply hold down the mouse right button. The guide will show you which command you are about to execute and allow you to accept it or choose another.
With Mouse Gestures, you can keep your eye on your work, which can increase your efficiency and productivity.
Summary
Wow! How’s that for a bunch of cool tools found only in DraftSight? I’m sure that at least one of them has made you curious enough to want to check it out. And if you’re anything like most CAD users, you’ll want to check out all the others as well.
Well, what are you waiting for? Don’t just take my word for it. You can get a free 30-day trial of DraftSight and see for yourself. And don’t worry, there are no strings attached… no credit card necessary… just go here: https://www.draftsight.com/freetrial, download, install, and go!
And, who knows? Maybe you’ll soon join the millions of others who have made DraftSight their favorite CAD platform.


